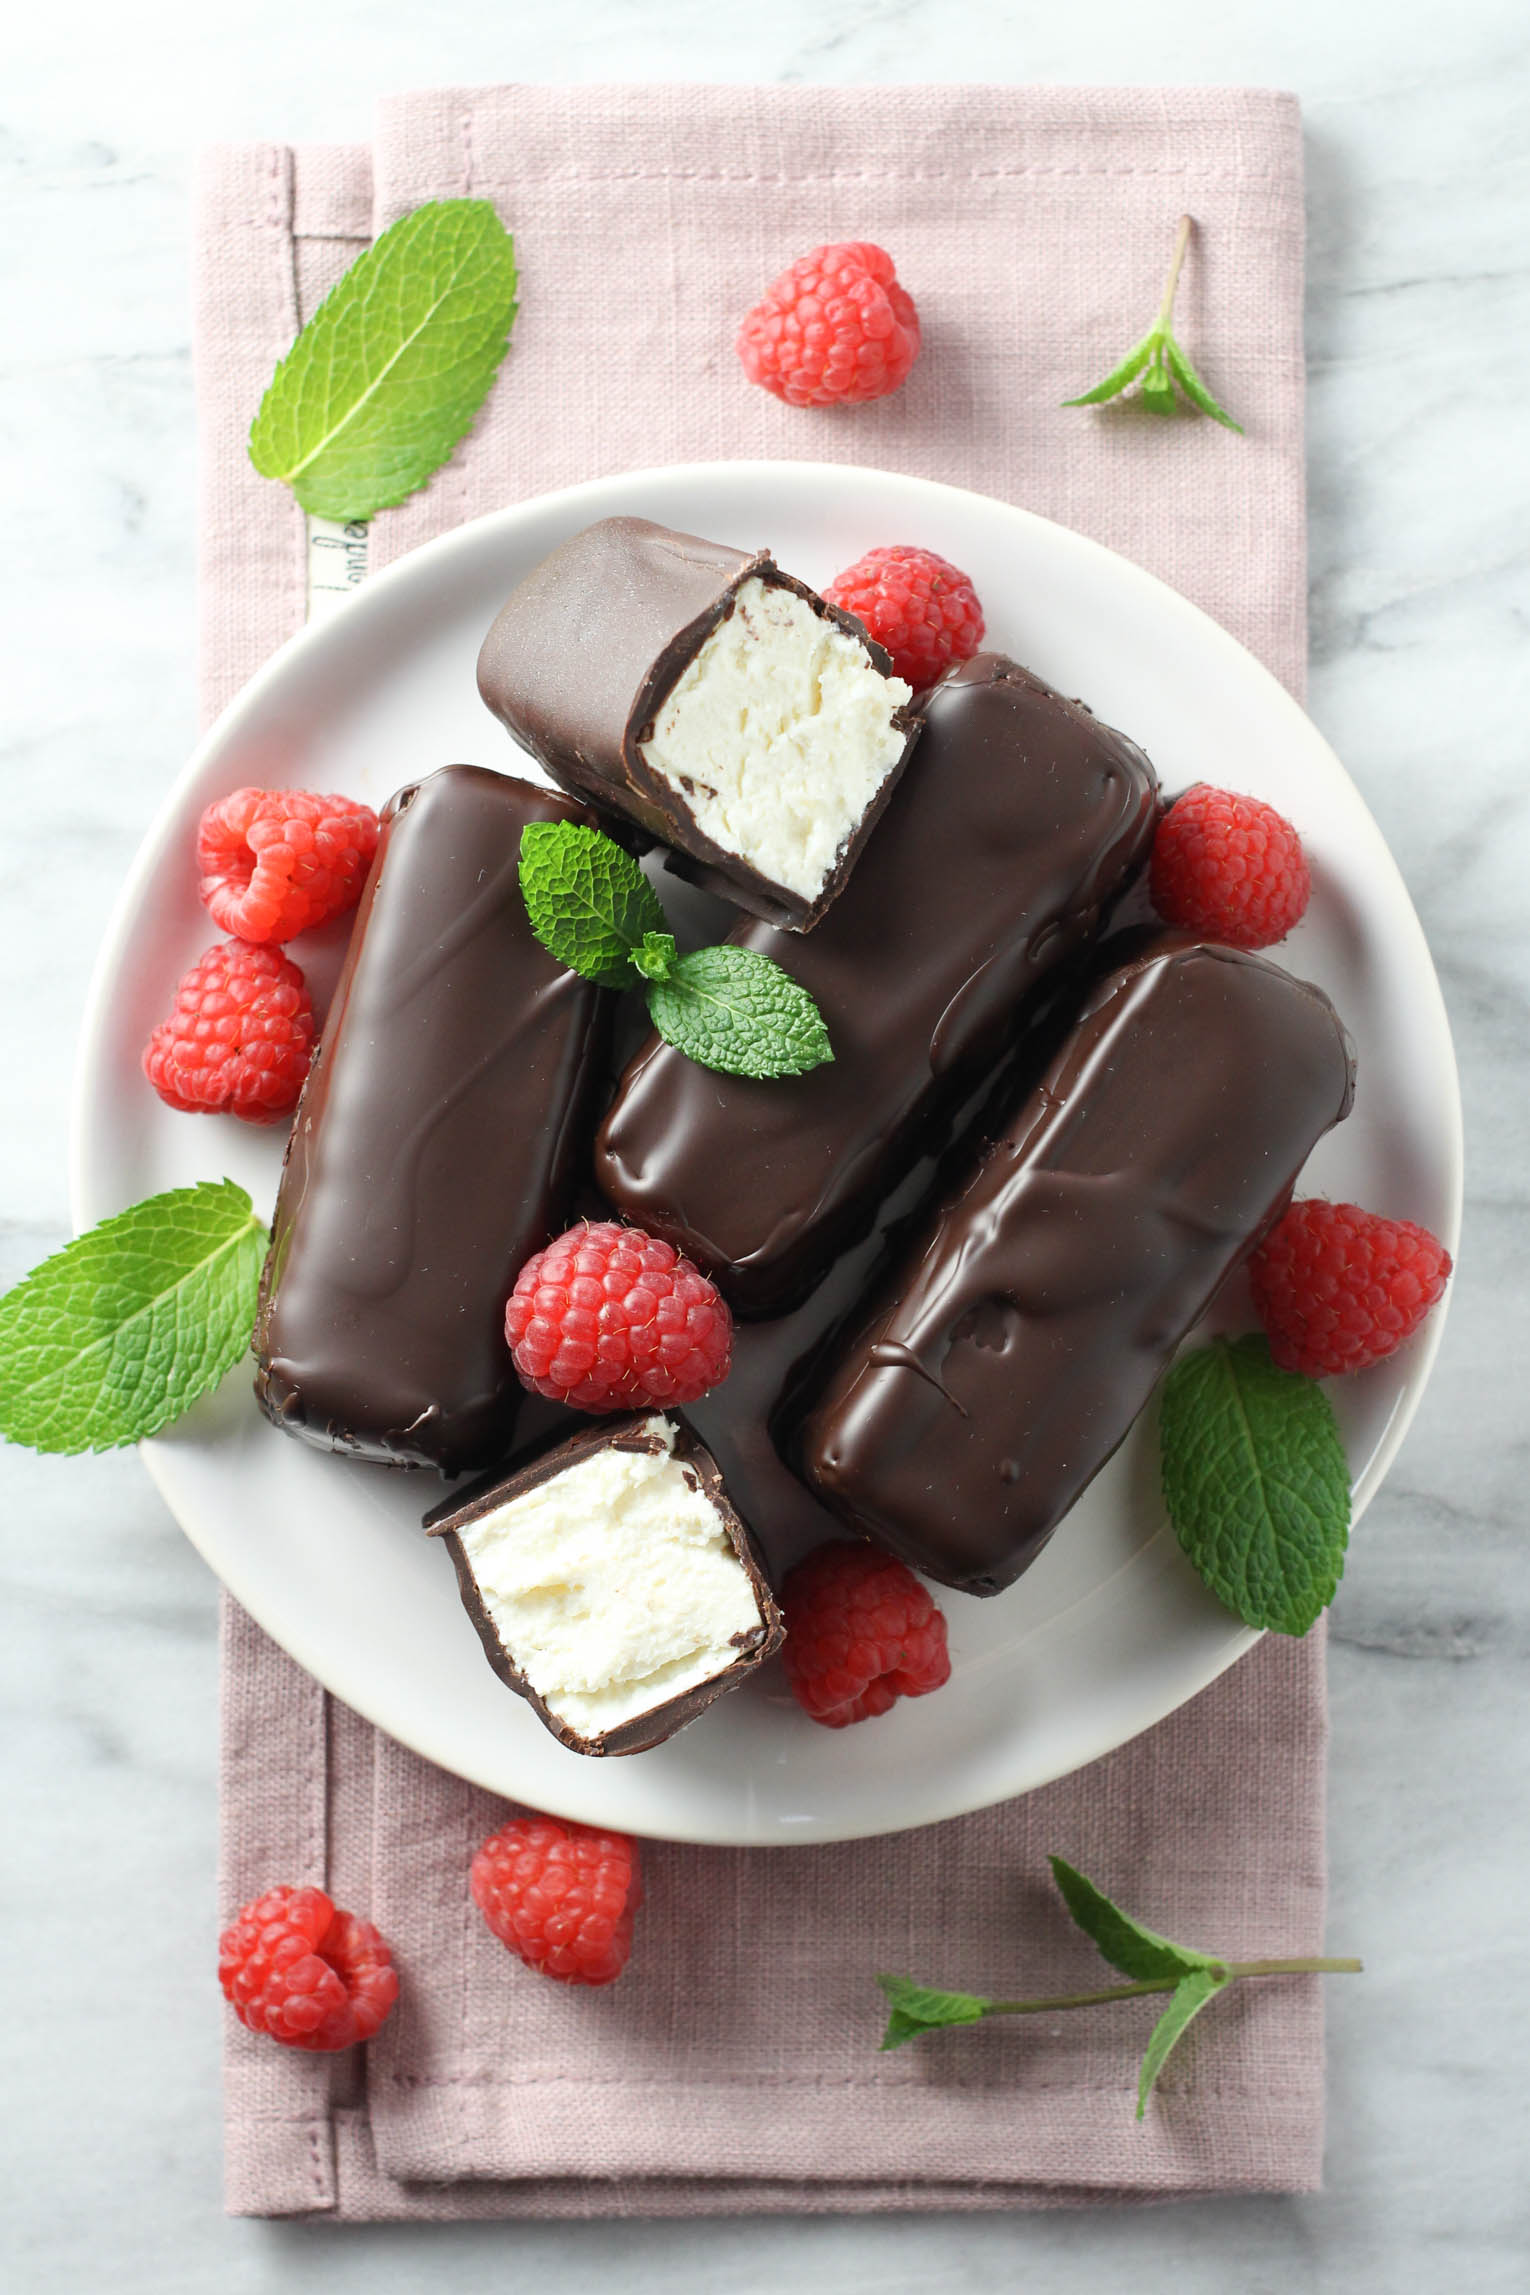
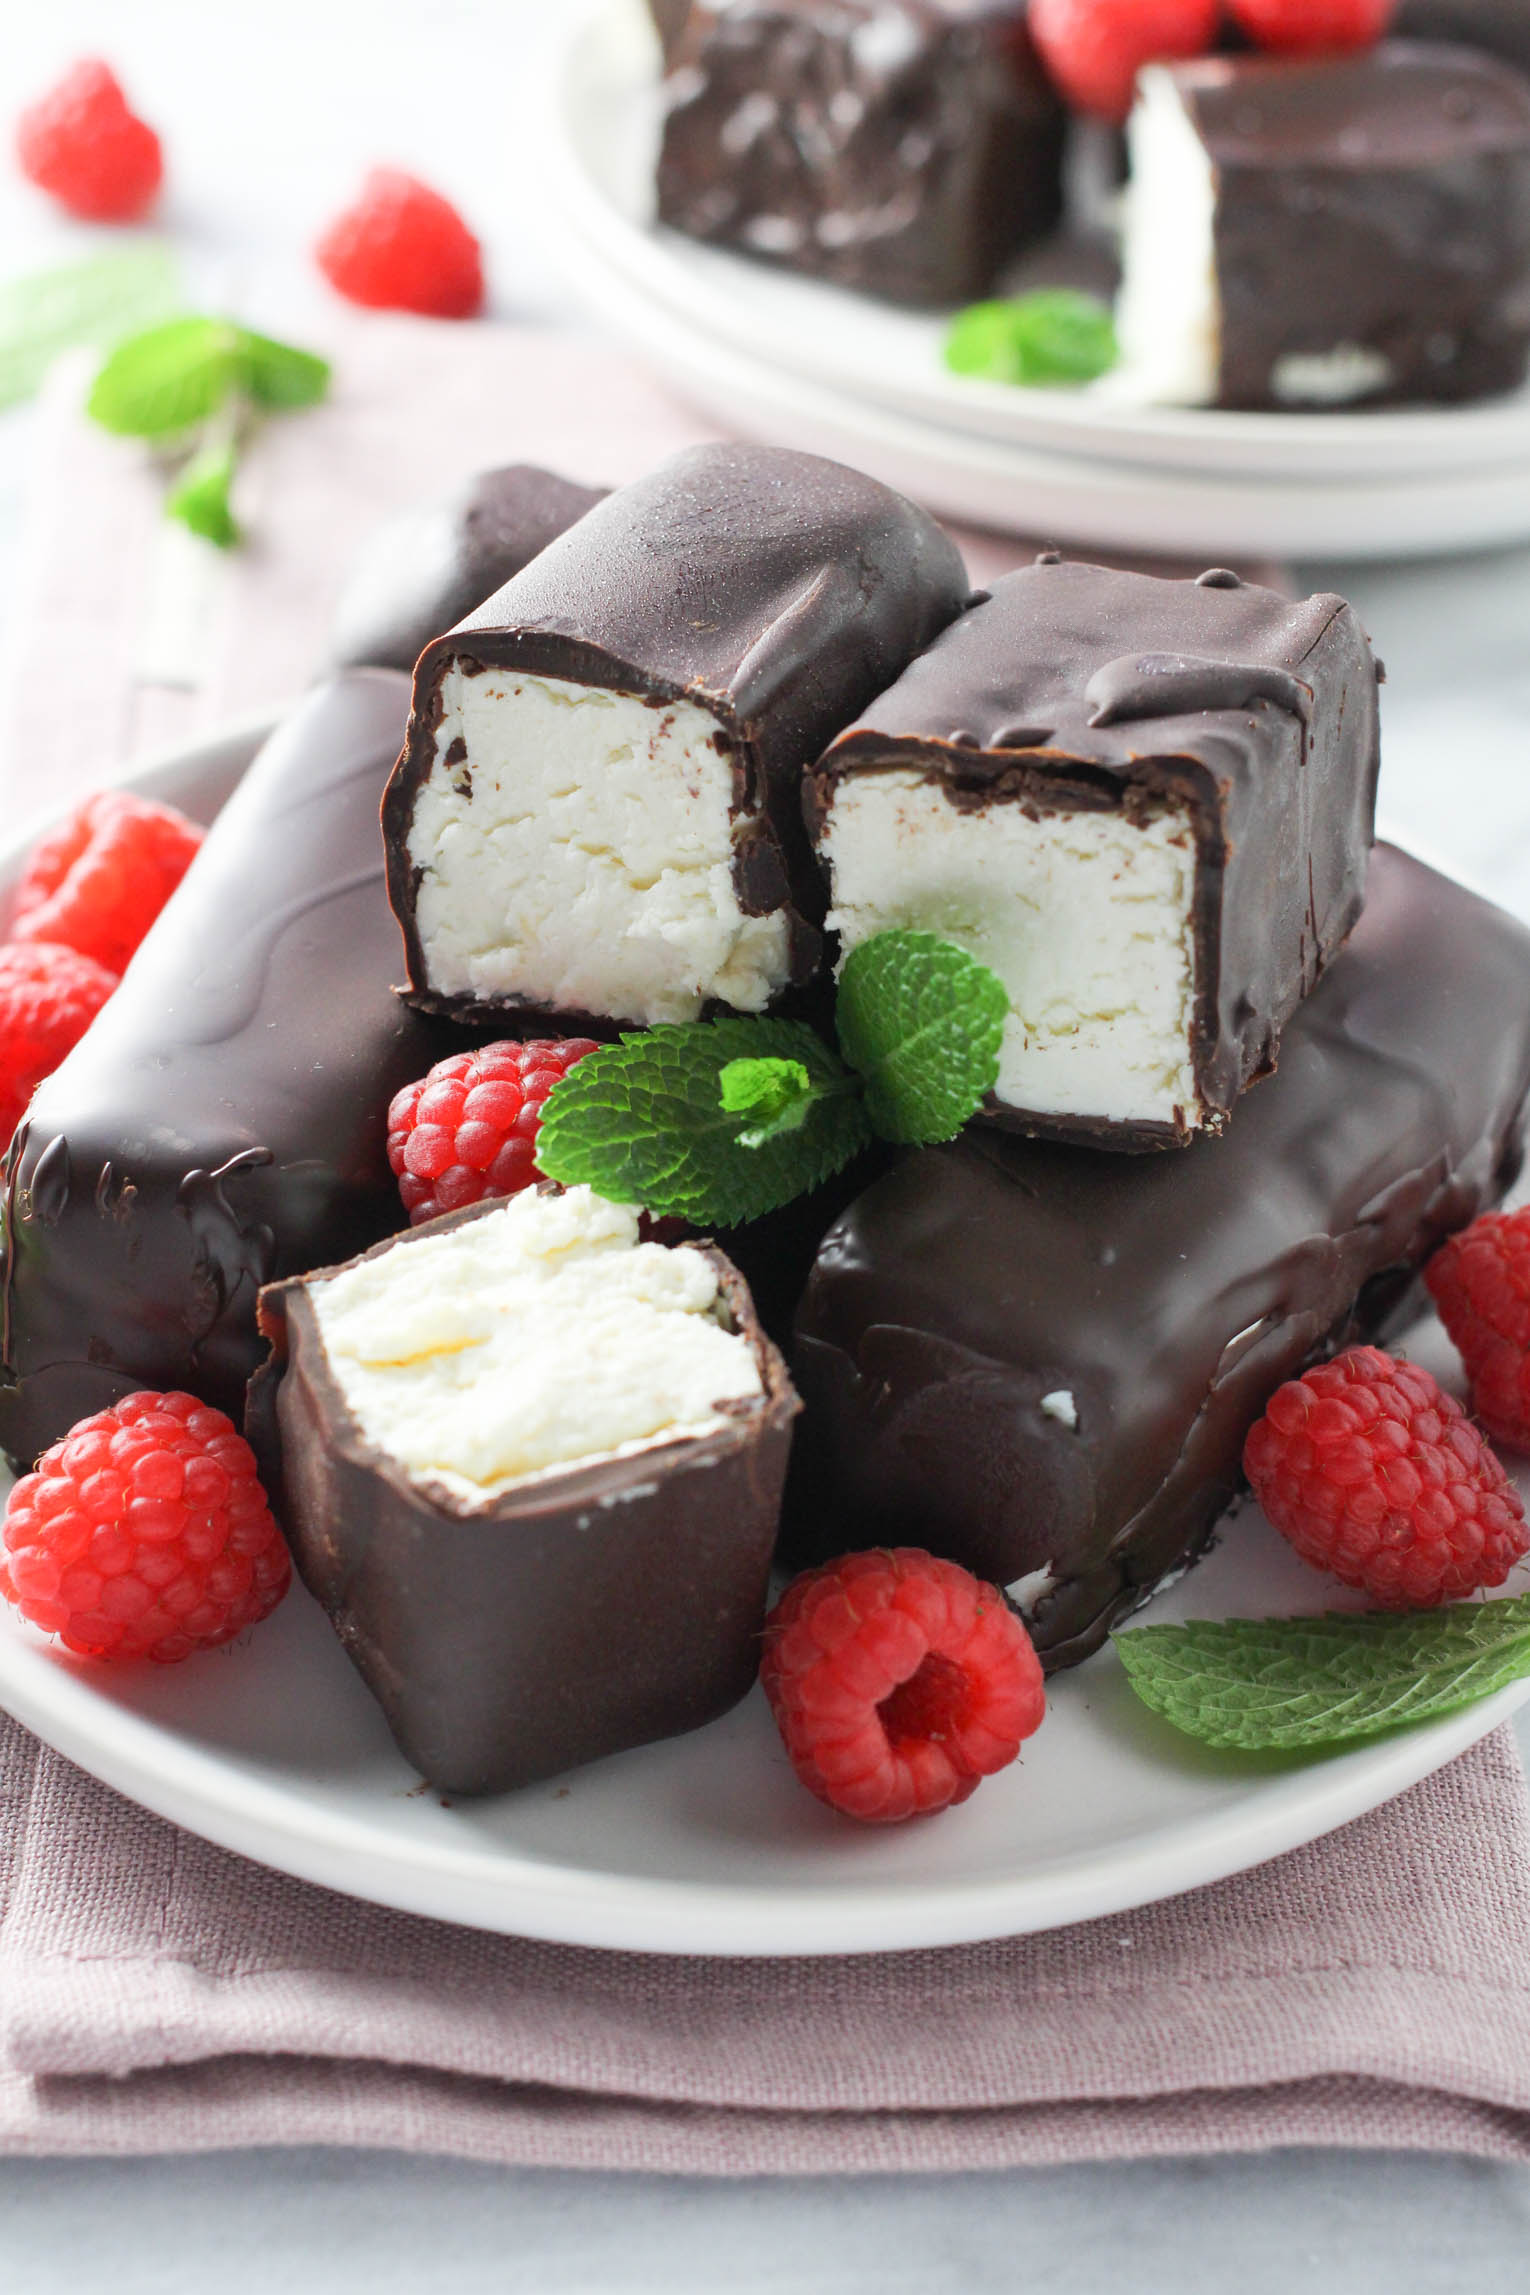
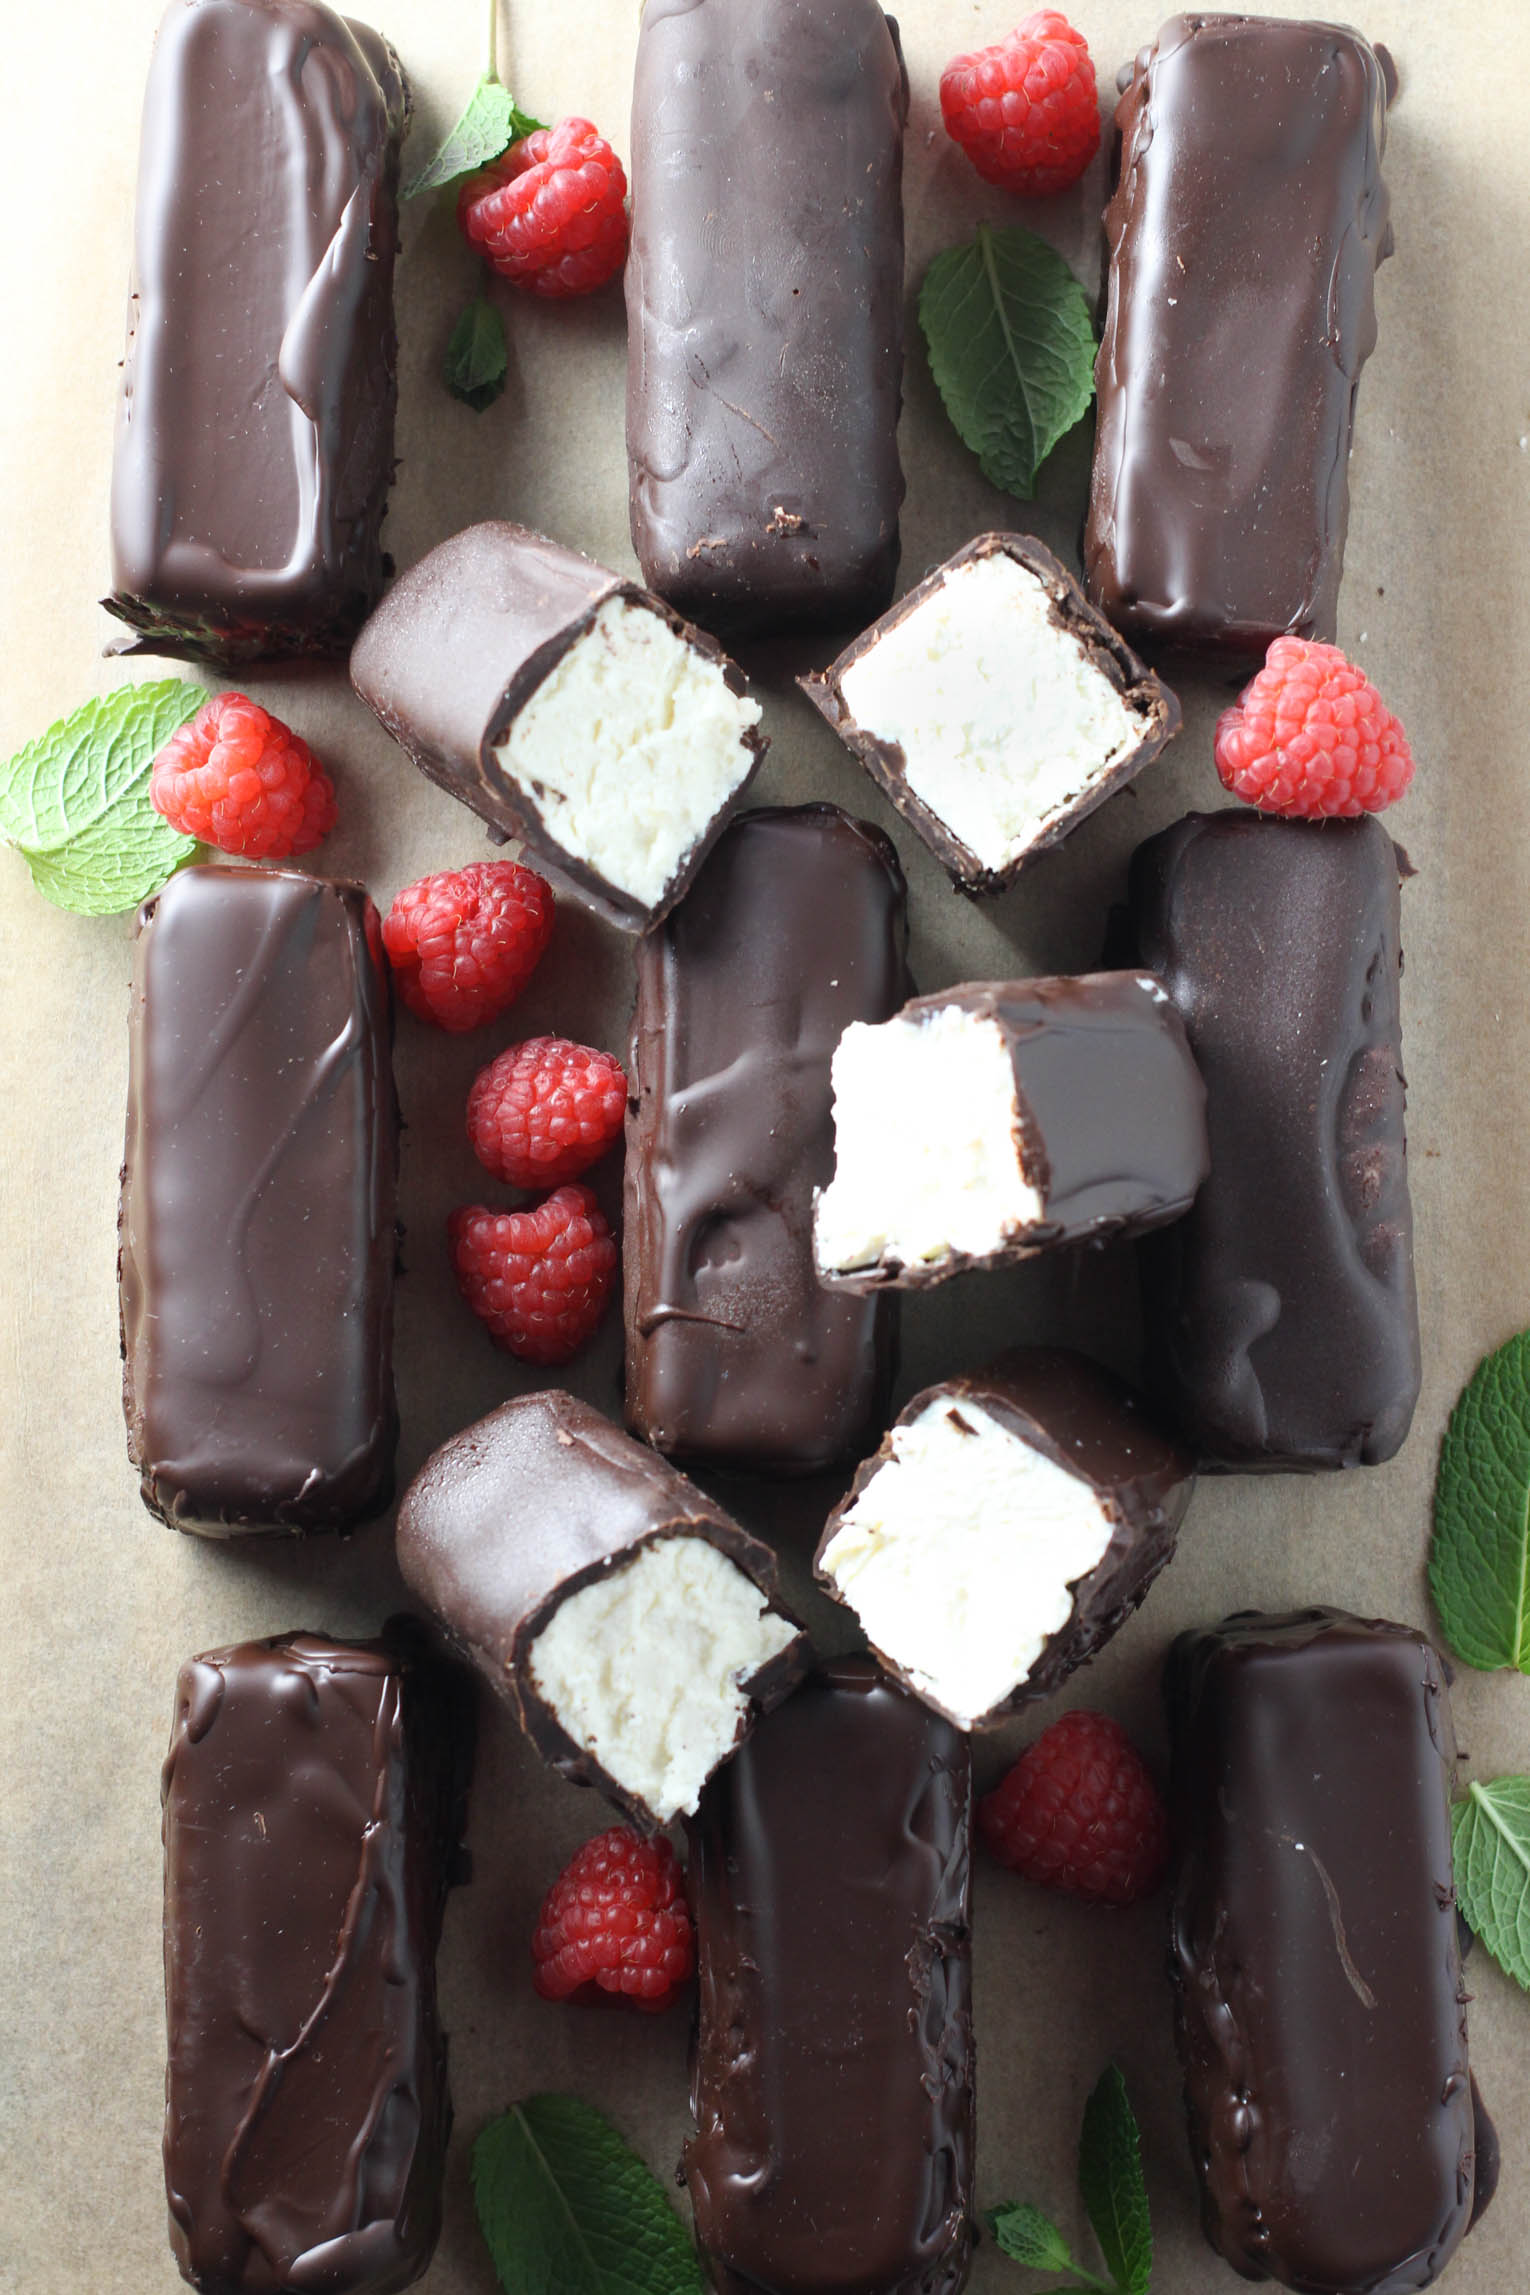
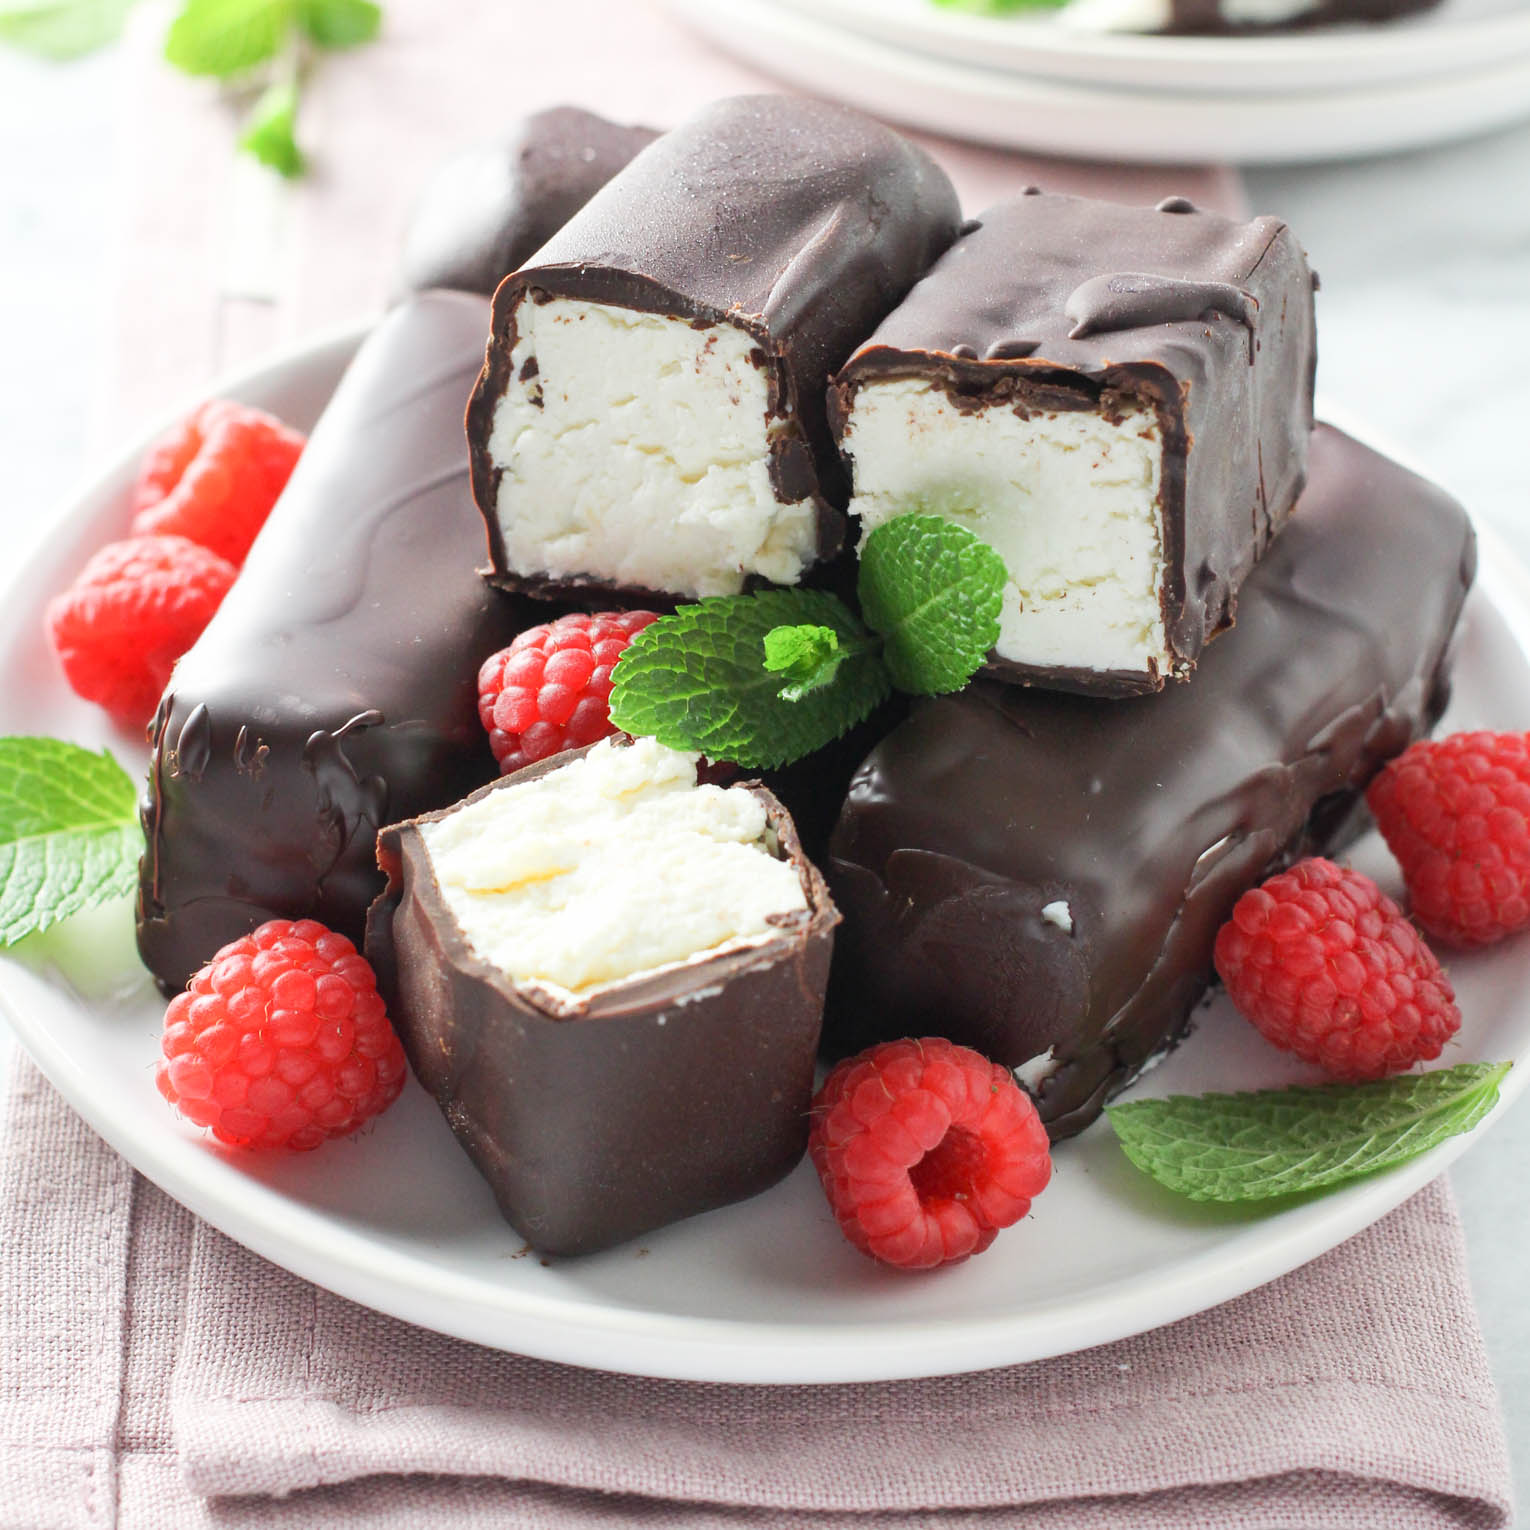
Syrok (or сырок), also known as the Russian chocolate-glazed sweet cheese bar (or глазированный шоколадом творожный сырок), is a classic Russian treat made with sweetened tvorog (farmer’s cheese) and coated in a thin layer of chocolate.
Syrok was one of those things we almost always bought at the store because there were so many options and they were very inexpensive.
But over time, those convenient little bars began to fill up with stabilizers, artificial flavors, palm oil, and other additives, turning what was once considered a healthy snack for kids into something many families didn’t feel good about.
That’s when homemade versions like this one made a big comeback—and honestly, they’re even better.
What is Syrok?
There are two main kinds of syrok—the simple version, which is just sweetened farmer’s cheese mixed with vanilla and sometimes raisins, and the more indulgent version: chocolate-glazed syrok, which is what we’re making here.
Outside of Russia, you can sometimes find these bars at European delis or specialty shops. They go by many names, including:
- cheesecake bars;
- curd bars;
- sweet cheese bars;
- quark bars;
- cottage cheese bars;
- farmer’s cheese bars.
And the prices can be steep.
Whatever they’re called, they all point to the same thing: a nostalgic, chocolate-covered dessert bar that’s surprisingly easy to make at home for a fraction of the cost.
Ingredient Notes
These simple ingredients come together to create the creamy, chocolate-glazed cheesecake bars that define authentic syrok:
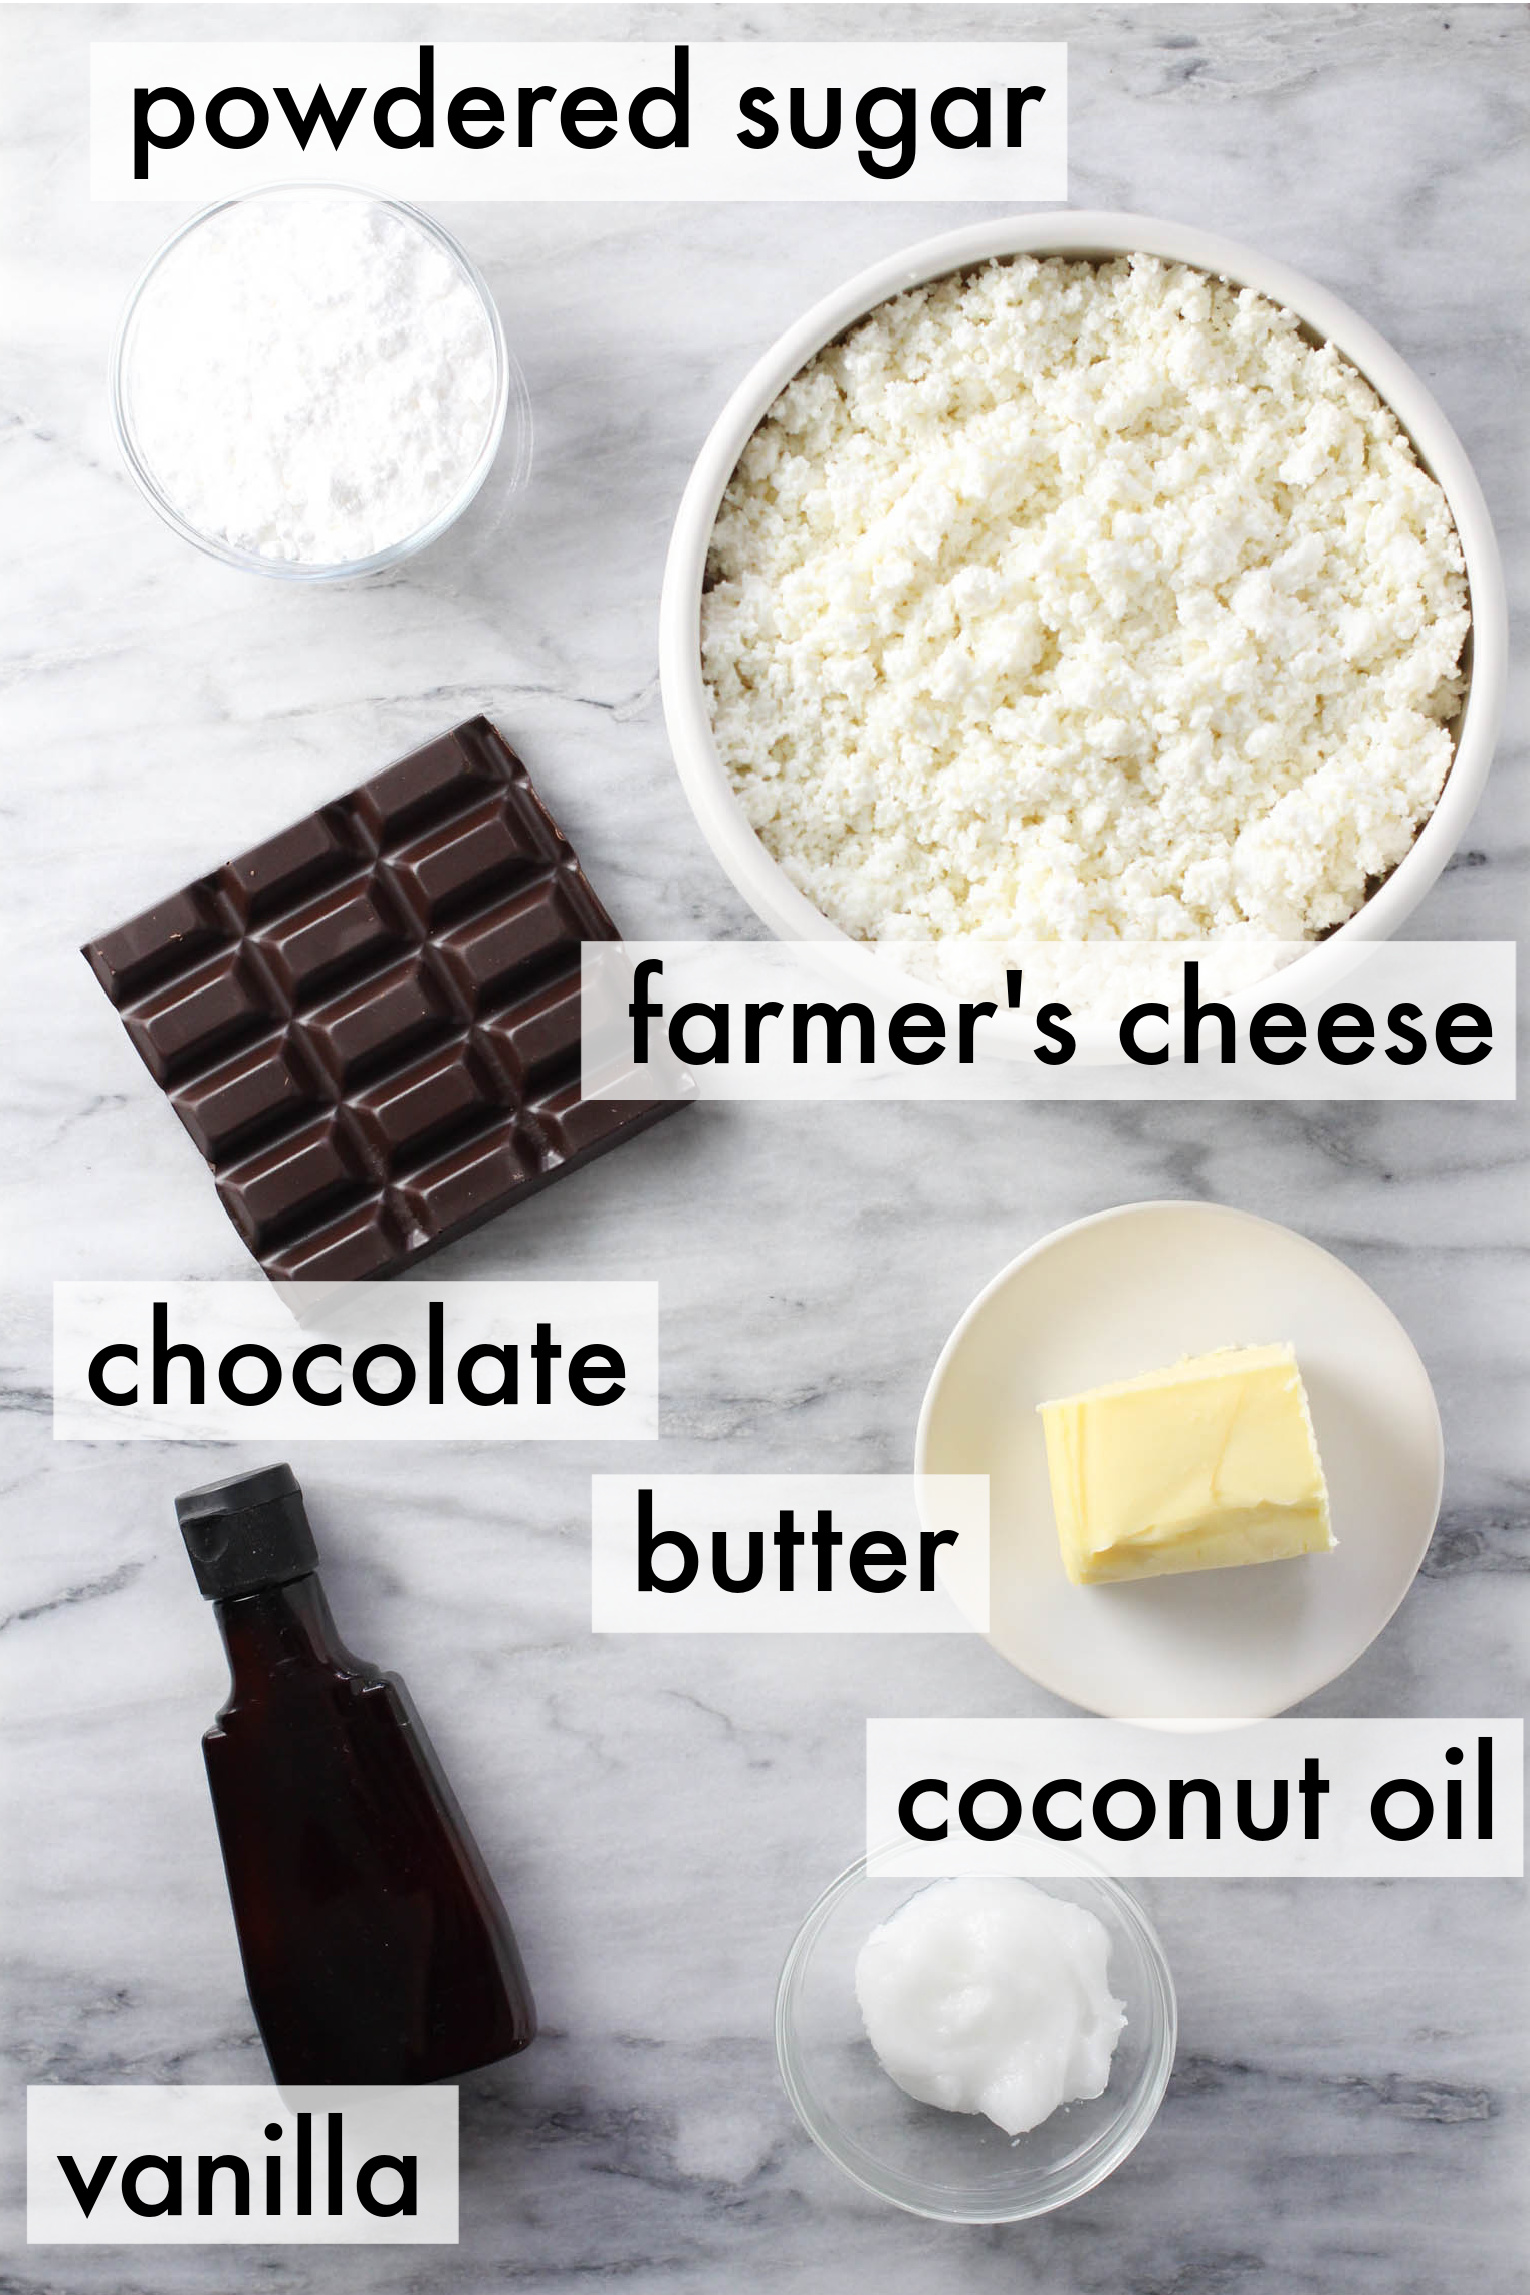
Here is a brief overview of the ingredients:
- Farmer’s cheese – This recipe is traditionally made with tvorog, a dry, unsalted Russian-style cottage cheese, but it can be tough to find outside Eastern Europe. Farmer’s cheese is the closest match and works perfectly.
- Unsalted butter – Butter helps smooth out the texture of the cheese mixture and adds rich, indulgent flavor.
- Powdered sugar – Traditional recipes call for powdered sugar, but if you’re looking for a healthier option, monk fruit sweetener or a drizzle of honey are good alternatives. Just note that natural sweeteners may slightly alter the texture and sweetness.
- Vanilla extract – Just a splash of pure vanilla extract (NOT imitation) balances the tangy cheese and rounds out the sweetness.
- Chocolate – You’ll melt chopped chocolate (dark, milk, or white) with either unsalted butter or coconut oil to create the signature chocolate-dipped coating! I prefer coconut oil, as it gives the coating a firmer finish and a subtle shine once it sets.
- Coconut oil (optional) – As mentioned above, I like adding coconut oil to the chocolate glaze, but you can also add butter instead.
Optional Filling
- Dulce de leche or berry jam – Totally optional, but adding a layer of dulce de leche or berry or apricot jam takes these bars to the next level. For this post, I made them with raspberry jam.
How to Make Russian Syrok
Ready to make a batch of creamy chocolate-covered syrok bars? Here, I’ll walk you through every step of the way:
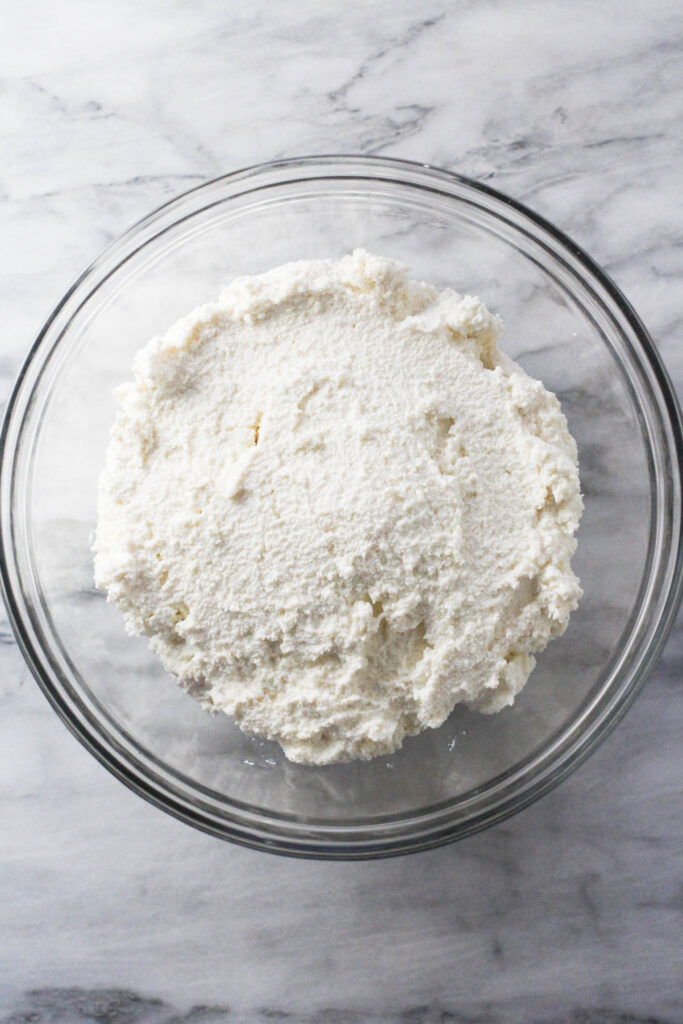
Step 1: Make the cheese mixture.
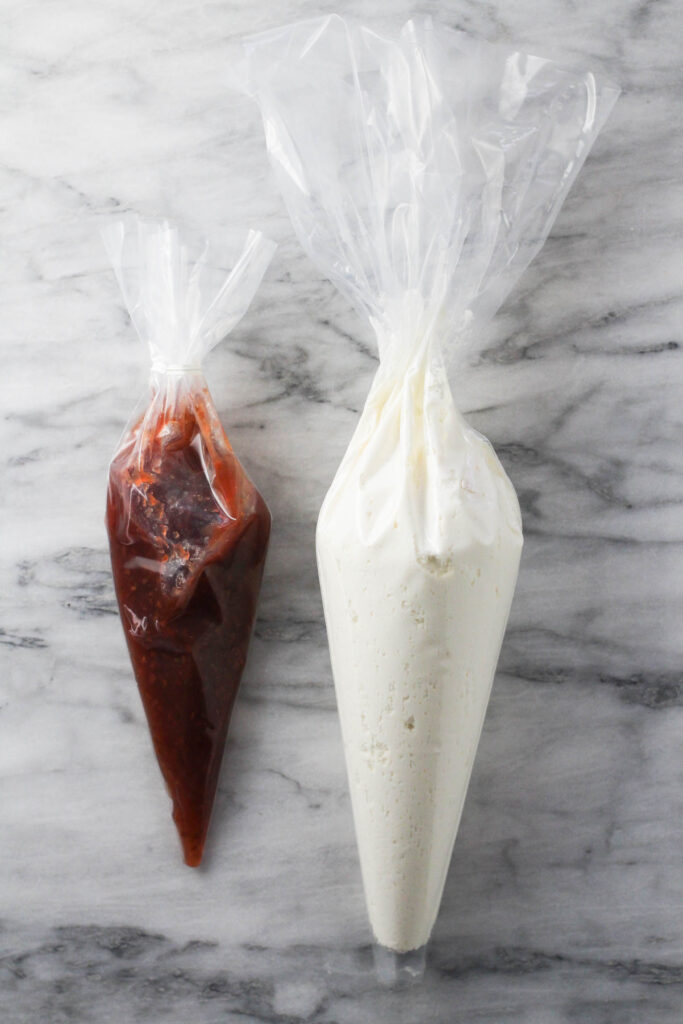
Blend the farmer’s cheese, melted butter, powdered sugar, and vanilla extract in a large bowl using an immersion blender until smooth. Then spoon the mixture into a piping bag (or a zip-top bag with the corner snipped off).
If adding the filling, fill a small piping bag with dulce de leche or berry jam.
Step 2: Shape the bars (choose one method):
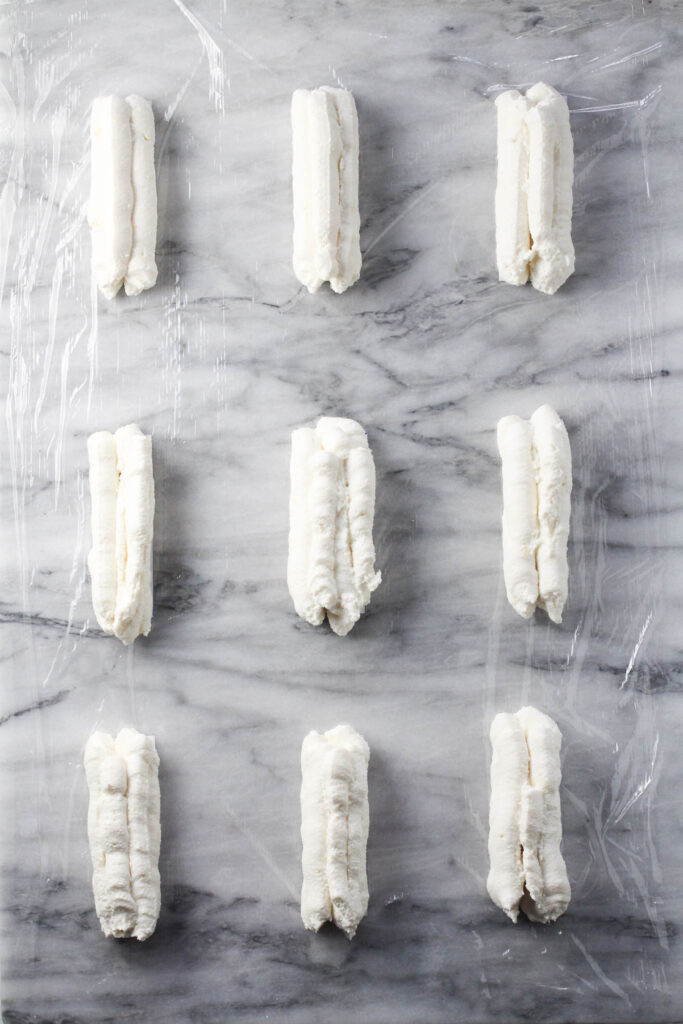
Option 1: Without a mold.
Line a cutting board or baking sheet with plastic wrap, then pipe the cheese mixture directly onto the plastic wrap, forming roughly 3-inch-long and 1-inch-thick bars.
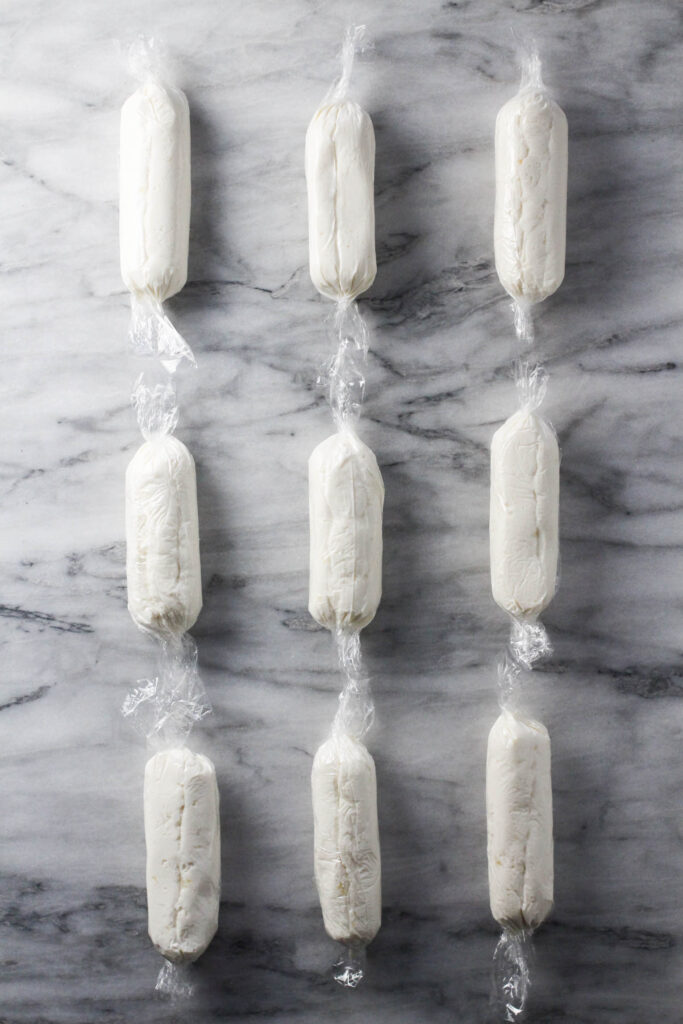
Cut the plastic wrap into sections, then wrap each bar tightly, shaping them into clean, uniform rectangles as you go. Once wrapped, place the bars in the freezer until they’re completely solid.
Option 2: With a mold.
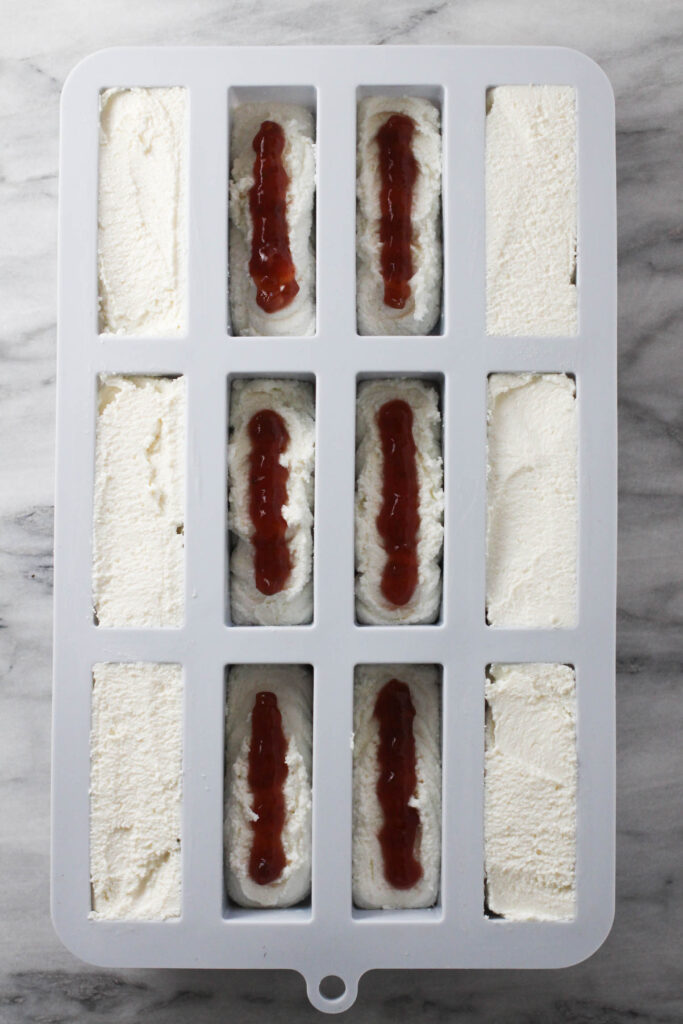
If adding the filling, pipe the cheese mixture into silicone molds, filling them halfway. Then pipe a touch of dulce de leche or berry jam into the center. Top off with the remaining cheese mixture.
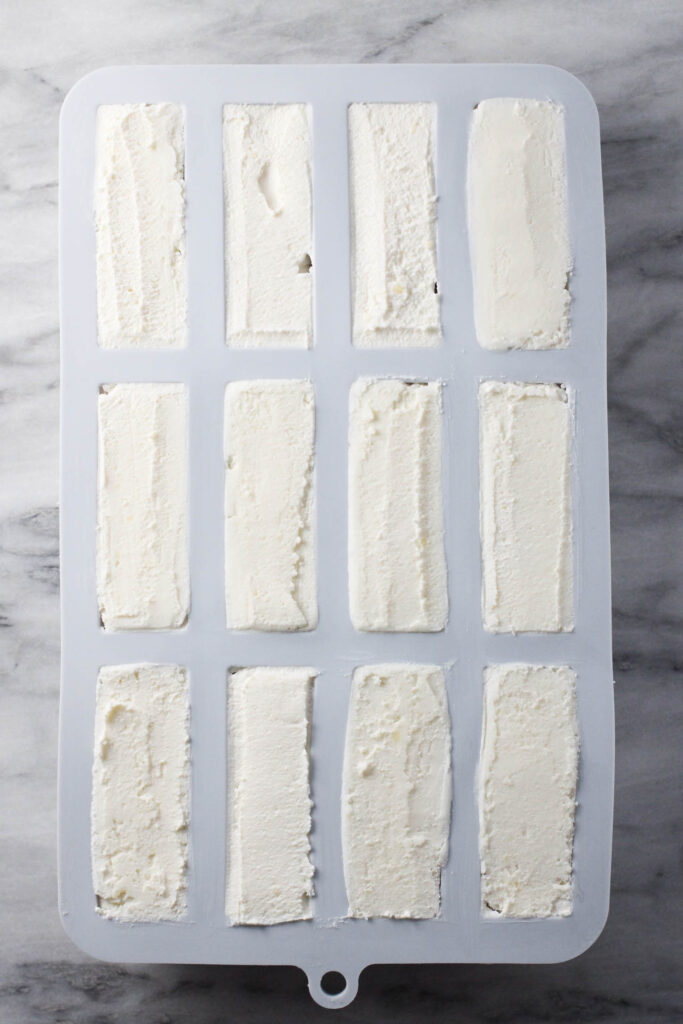
Otherwise, fill each mold to the top and smooth the surface with a flat knife or spatula.
Pop the molds in the freezer until the bars are completely solid.
Step 3: Make the chocolate glaze.
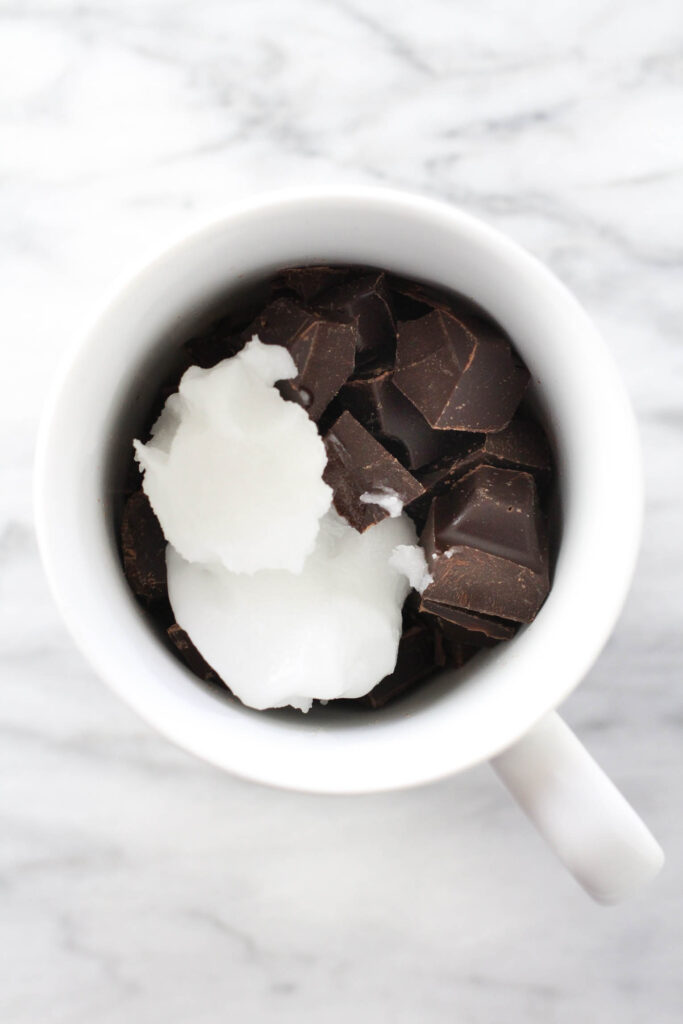
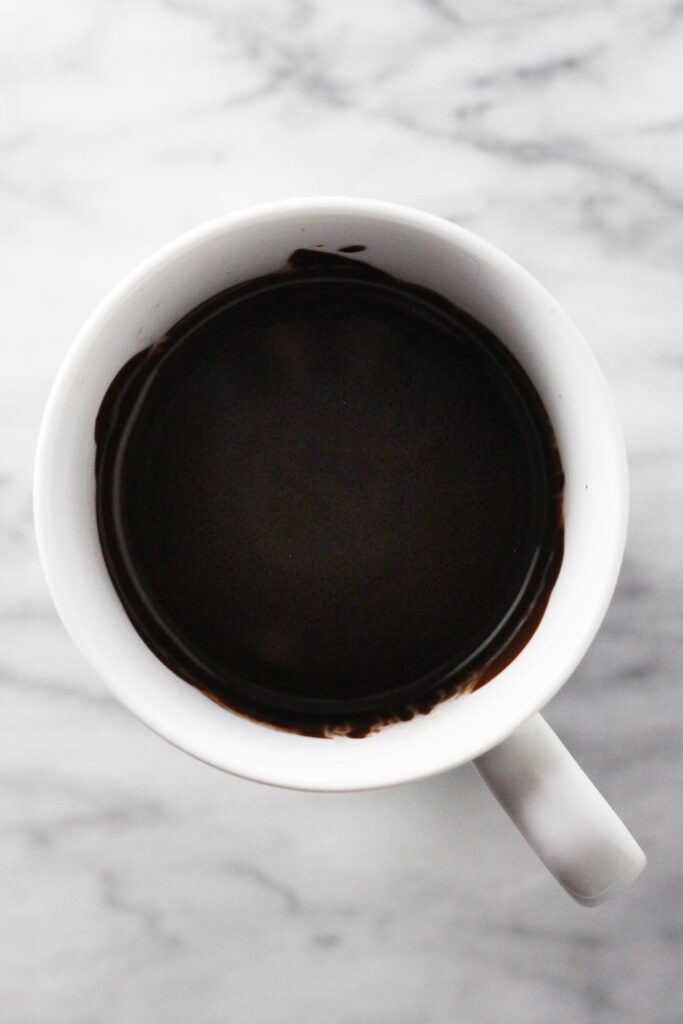
Microwave the chocolate and coconut oil (or butter) together in a heat-safe container (I recommend something deep and narrow, like a coffee mug) in short 5-10-second bursts, stirring between each, until it reaches 92°F (33.3°C) for dark chocolate, or 90°F (32.2°C) for milk/white chocolate.
Alternatively, melt it gently over a double boiler on the stovetop.
Step 4: Coat the bars in chocolate glaze (pour-over method).
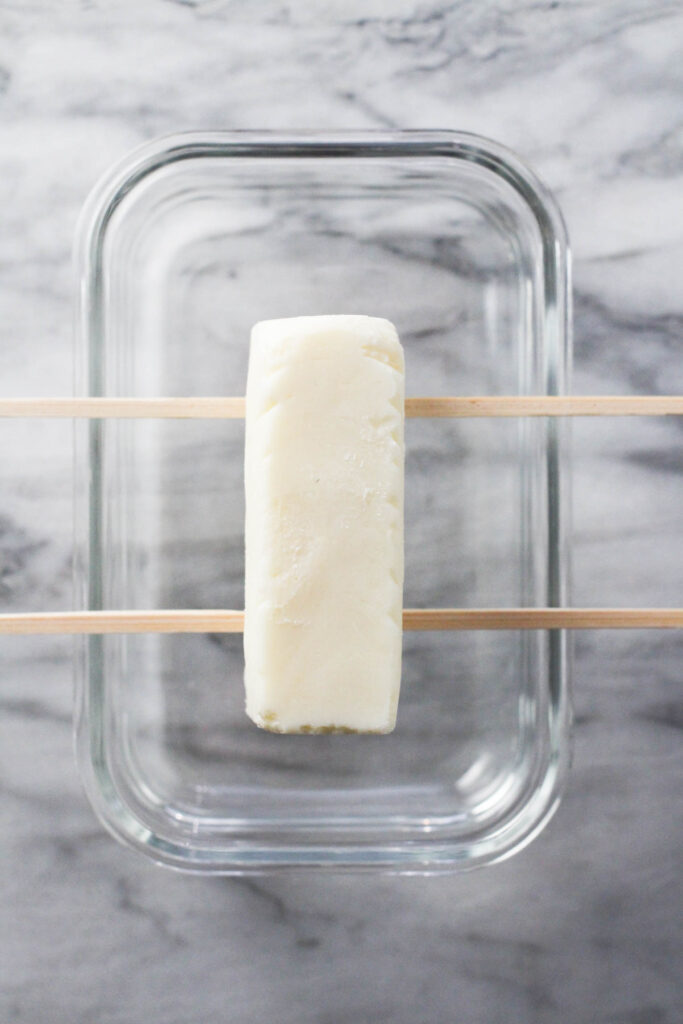
Line a tray or cutting board with parchment paper or plastic wrap. Remove the bars from the freezer and unwrap them (or pop them out of the molds). Keep one or two bars at room temperature and place the rest back in the freezer.
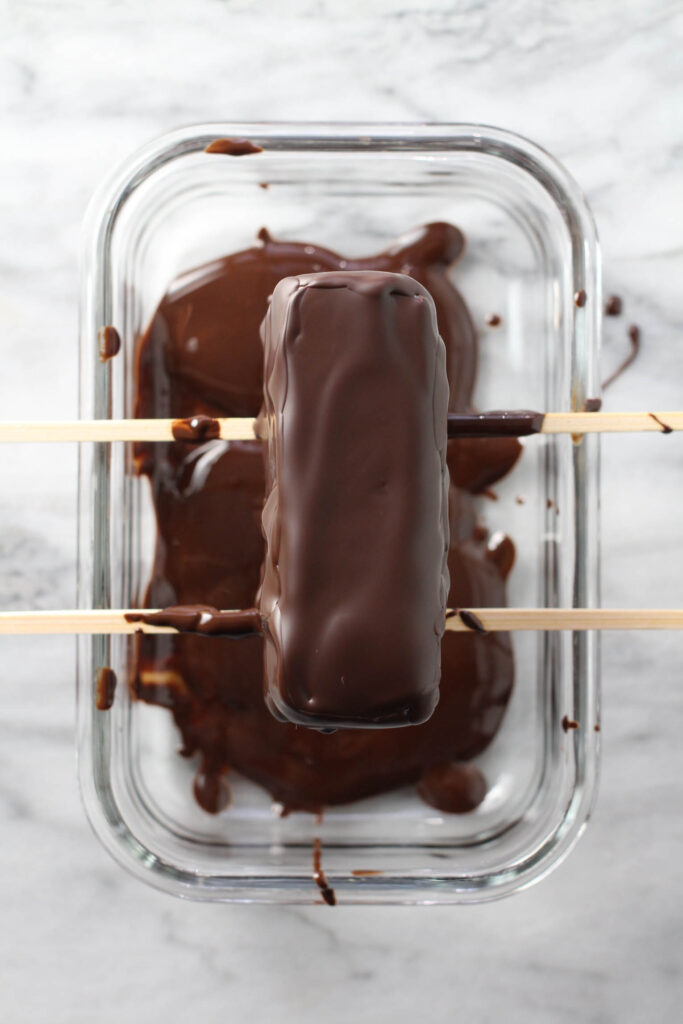
Set two skewers or chopsticks across a bowl or container. Place one frozen bar on top of them. Holding a mug of warm chocolate glaze in one hand, spoon the glaze over the top and sides of the bar.
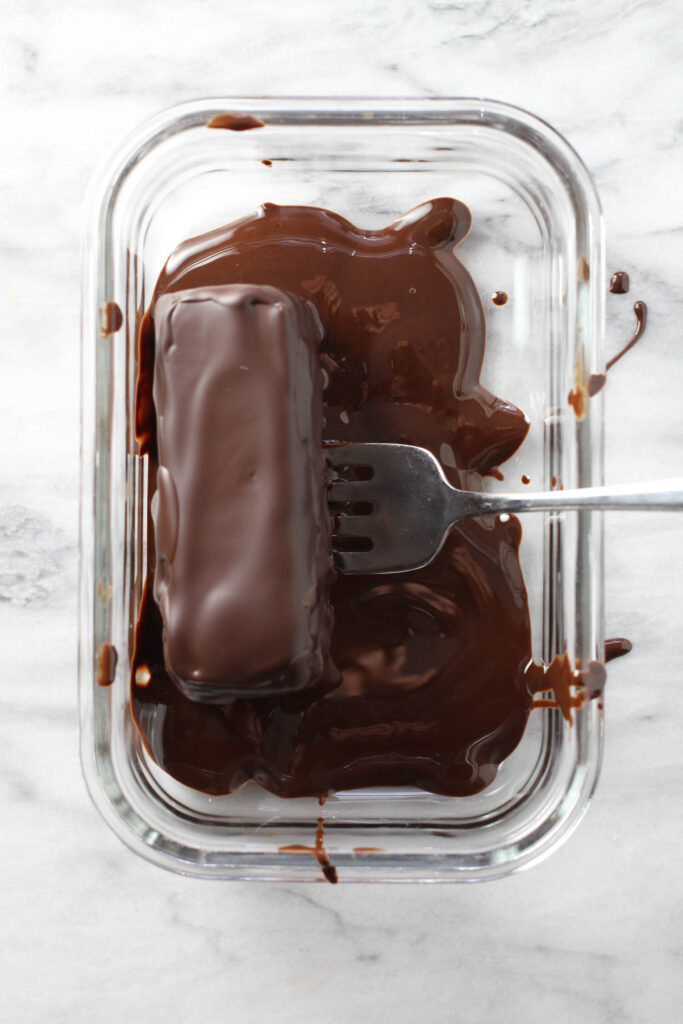
Lift the bar with a fork and lightly dip or press the bottom into the chocolate that has pooled in the bowl, or spoon a little underneath to coat it evenly.
Transfer the coated bar to the prepared tray, pushing it off the fork with a toothpick. Repeat with the remaining bars.
Let the bars rest in the fridge for 1 to 2 hours before serving.

Recipe Tips
Making syrok from scratch is surprisingly simple, but these tips can make the results even better:
- Check the moisture content of your cheese. Too much moisture in the cheese can cause soft bars that won’t hold their shape well. If your cheese feels wet, wrap it in a clean kitchen towel and press gently to remove excess liquid before blending.
- No immersion blender? A food processor works just as well, just process the cheese mixture until it’s creamy and lump-free.
- Use silicone molds if you have them. Rectangular molds make shaping much easier and give you that classic, polished look. However, if you’re not particular about shape, any small silicone mold shape will work just fine.
- Keep the chocolate glaze warm. Before melting the chocolate, warm the mug under hot running water, then dry it thoroughly. This helps the glaze stay fluid while you work.
- Work in batches! The bars need to be very firm when they are being covered the glaze, so I suggest keeping only one or two bars out, and putting the rest back in the freezer.
Variations
Here are a few popular ways to customize the classic version:
- Lemon zest – Vanilla is classic, but adding a little bit of lemon zest can give the creamy cheese filling a whole new vibe.
- Shredded coconut – Consider folding shredded coconut into the cheese mixture before piping. Shredded coconut helps to firm up the filling, absorb moisture, and give it a lightly chewy texture and sweet aroma. It’s also a popular flavor variation (“кокосовый сырок”).
- Fillings – For a fun variation, try filling the bars with dulce de leche or strawberry, raspberry, blueberry, cherry, or apricot jam to create syrok bars with a filling (“творожный сырок с начинкой”).
- Cocoa powder – Stir in 1–2 teaspoons of cocoa powder into the cheese mixture to create chocolate-flavored cheese cake bars (“творожный сырок с шоколадной начинкой”).
Storing & Freezing
To store: Keep your finished bars in an airtight container in the refrigerator for 5-7 days. If stacking, layer them between parchment paper, so the chocolate coating doesn’t stick.
To freeze: Syrok freezes very well! Once the chocolate coating is fully set, place the bars in a single layer on a parchment-lined tray and freeze until solid. Then transfer them to a freezer-safe bag or container. They’ll keep for up to 2 months. Thaw in the fridge for 1 to 2 hours for the best texture.
FAQs
More Eastern European Recipes
If you loved these chocolate-covered cheesecake bars, here are a few more traditional dishes to try next:
- Pashtet Recipe (Russian Chicken Liver Pâté)
- Russian Vinaigrette Salad (Beet and Potato Salad Recipe)
- Okroshka (Russian Cold Soup)
- Russian Fisherman Soup – Uha
- Easy Borscht Recipe (Beet Soup with Beef)
Syrok (Russian Chocolate Glazed Cheesecake Bars)
Equipment
- Immersion Blender (or food processor)
- Skewers (or chopstics)
- plastic wrap
- silicone molds (optional)
Ingredients
For the Cheese Mixture:
- 1 pound farmer's cheese (or similar fresh cheese, see the notes)
- ¼ cup unsalted butter (melted)
- ¼ cup powdered sugar
- 1 tsp vanilla extract
For the Glaze:
- 5.25 oz (150 grams) 70% dark chocolate (chopped)
- 1½ Tbsp coconut oil (or unsalted butter)
Optional Filling:
- ½ cup berry jam or dulche de leche
Instructions
Make the Cheese Mixture:
- Place the Farmer's cheese into a large bowl. Add the melted butter, powdered sugar, and vanilla extract.
- Blend with an immersion blender until smooth and creamy.
- Transfer the mixture into a piping bag.
- If adding filling, fill a small piping bag with dulce de leche or berry jam.
Form the Bars (Choose one Method):
Without a Mold:
- Line a cutting board or baking sheet with plastic wrap.
- Pipe the cheese mixture directly onto the plastic wrap, forming roughly 3-inch-long and 1-inch-thick bars.
- Cut the plastic wrap into sections, then wrap each bar tightly, shaping them into clean, uniform rectangles as you go. You can also cut the plastic wrap first and pipe the bars onto the pre-cut wrap. (You'll need a 4.5"X6" piece of wrap for each bar.)
- Place the bars in the freezer for 2-3 hours or until they are fully solid.
With a Mold:
- Pipe the batter into silicone molds, smoothing the top with a flat knife or spatula.
- If adding filling: Pipe halfway, then pipe a touch of dulce de leche or berry jam into the center. Top off with the remaining cheese mixture.
- Place the mold into the freezer for 2-3 hours or until the bars are fully solid.
Make the Chocolate Glaze:
- Place the chocolate and coconut oil (or butter) in a heat-safe container. Melt in the microwave in 5–15-second bursts, stirring between each, until it reaches 92°F (33.3°C) for dark chocolate, or 90°F (32.2°C) for milk/white chocolate. Or use a double boiler.
Coat the Bars in Chocolate Glaze:
- Cover a tray or a cutting board with parchment paper or plastic wrap.
- Remove the bars from the freezer. Unwrap them or pop them out of the molds. Leave 1–2 bars out to work with and return the rest to the freezer so they stay firm.
- Place two skewers or chopsticks across a bowl or container. Set one frozen bar on top of them.
- Hold a mug of warm chocolate glaze in one hand. Using a spoon, scoop and pour the glaze over the bar, covering the top and sides evenly.
- Lift the bar with a fork. Lightly press or dip the bottom into the chocolate that has pooled in the bowl, or spoon a little glaze underneath to coat.
- Move the coated bar to the prepared tray, sliding it off the fork with a toothpick for a clean release.
- Continue coating the remaining bars, working with only a couple at a time so they stay fully frozen.
- Chill the bars in the fridge until the chocolate firms up. For a softer texture, let them rest in the fridge for 1 to 2 hours before serving.
Recipe Notes
Tips
- Substitutes for farmer’s cheese: If you can’t find farmer’s cheese, use German quark, pressed cottage cheese, baker’s cheese, or dry curd cottage cheese.
- Remove excess moisture: If the cheese feels wet, wrap it in a clean kitchen towel and gently press out any excess liquid before blending.
- Silicone molds: Rectangular molds give you that classic, polished look. However, any small silicone mold shape will work just fine.
- Work in batches: Keep one or two bars at room temperature and return the rest to the freezer.
- Keep the chocolate warm: Before melting the chocolate, warm the mug under hot running water, then dry it thoroughly.
Dipping Method (Alternative Coating Option)
- Keep the chocolate glaze warm: Place the bowl over a pot of hot water to keep the glaze fluid. Stir often to maintain a smooth consistency.
- Dip the bar: Using two forks, dip it straight into the warm chocolate glaze, covering it completely.
- Shake off excess: Lift the bar out and gently tap the fork on the bowl’s edge to remove excess chocolate.
- Transfer to the tray: Slide the dipped bar onto the parchment-lined tray using a toothpick or small knife to avoid fingerprints.
- Work fast: Frozen bars cool the glaze quickly, so you may need to reheat the chocolate between batches.
Variations
- Lemon zest: Adds a bright twist to the classic vanilla flavor.
- Shredded coconut: Fold into the cheese mixture for a firmer, lightly chewy, coconut-scented filling.
- Fillings: Pipe a touch of dulce de leche or fruit jams (strawberry, raspberry, blueberry, cherry, apricot) into syrok bars for more flavor.
- Cocoa powder: Mix in 1–2 tsp to make chocolate syrok bars.
Storing
- To store: Keep bars in an airtight container in the fridge for 5–7 days. If stacking, separate with parchment paper.
- To freeze: Freeze bars in a single layer, then transfer to a freezer-safe container. Keep up to 2 months. Thaw in the fridge for 1–2 hours.
The nutrition facts are an estimate. Variations in ingredient brands, portion sizes, or substitutions can affect the final nutritional values. For the most accurate information, please use a nutrition calculator or consult with a healthcare provider. Always ensure that each of the ingredients is allowed in your diet.

Meet Maria
Maria Ushakova is a holistic nutritionist and food blogger. She focuses on developing easy recipes using real food ingredients. She believes that healthy food is delicious and anyone can learn how to cook it. Maria’s work has appeared on numerous popular websites as well as in print.