This Instant Pot Turkey Bone Broth is the perfect way to use every last bit of the bird! Leftover bones, aromatics, and a few other simple ingredients are all you need to create a collagen-packed, intensely flavorful homemade broth perfect for soups, stews, grains, sipping straight, and more.
Whenever I’m in charge of the turkey on Thanksgiving, I save every last bit of the leftover bird (the wings, carcass, neck, even the trimmings) to make bone broth.
Unlike regular broth or stock, bone broth typically simmers for at least 12 hours to extract collagen, gelatin, and minerals from the bones, creating a richer, more nourishing liquid. With the power of an electric pressure cooker, however, you can get all that deep flavor and nutrition in a fraction of the time.
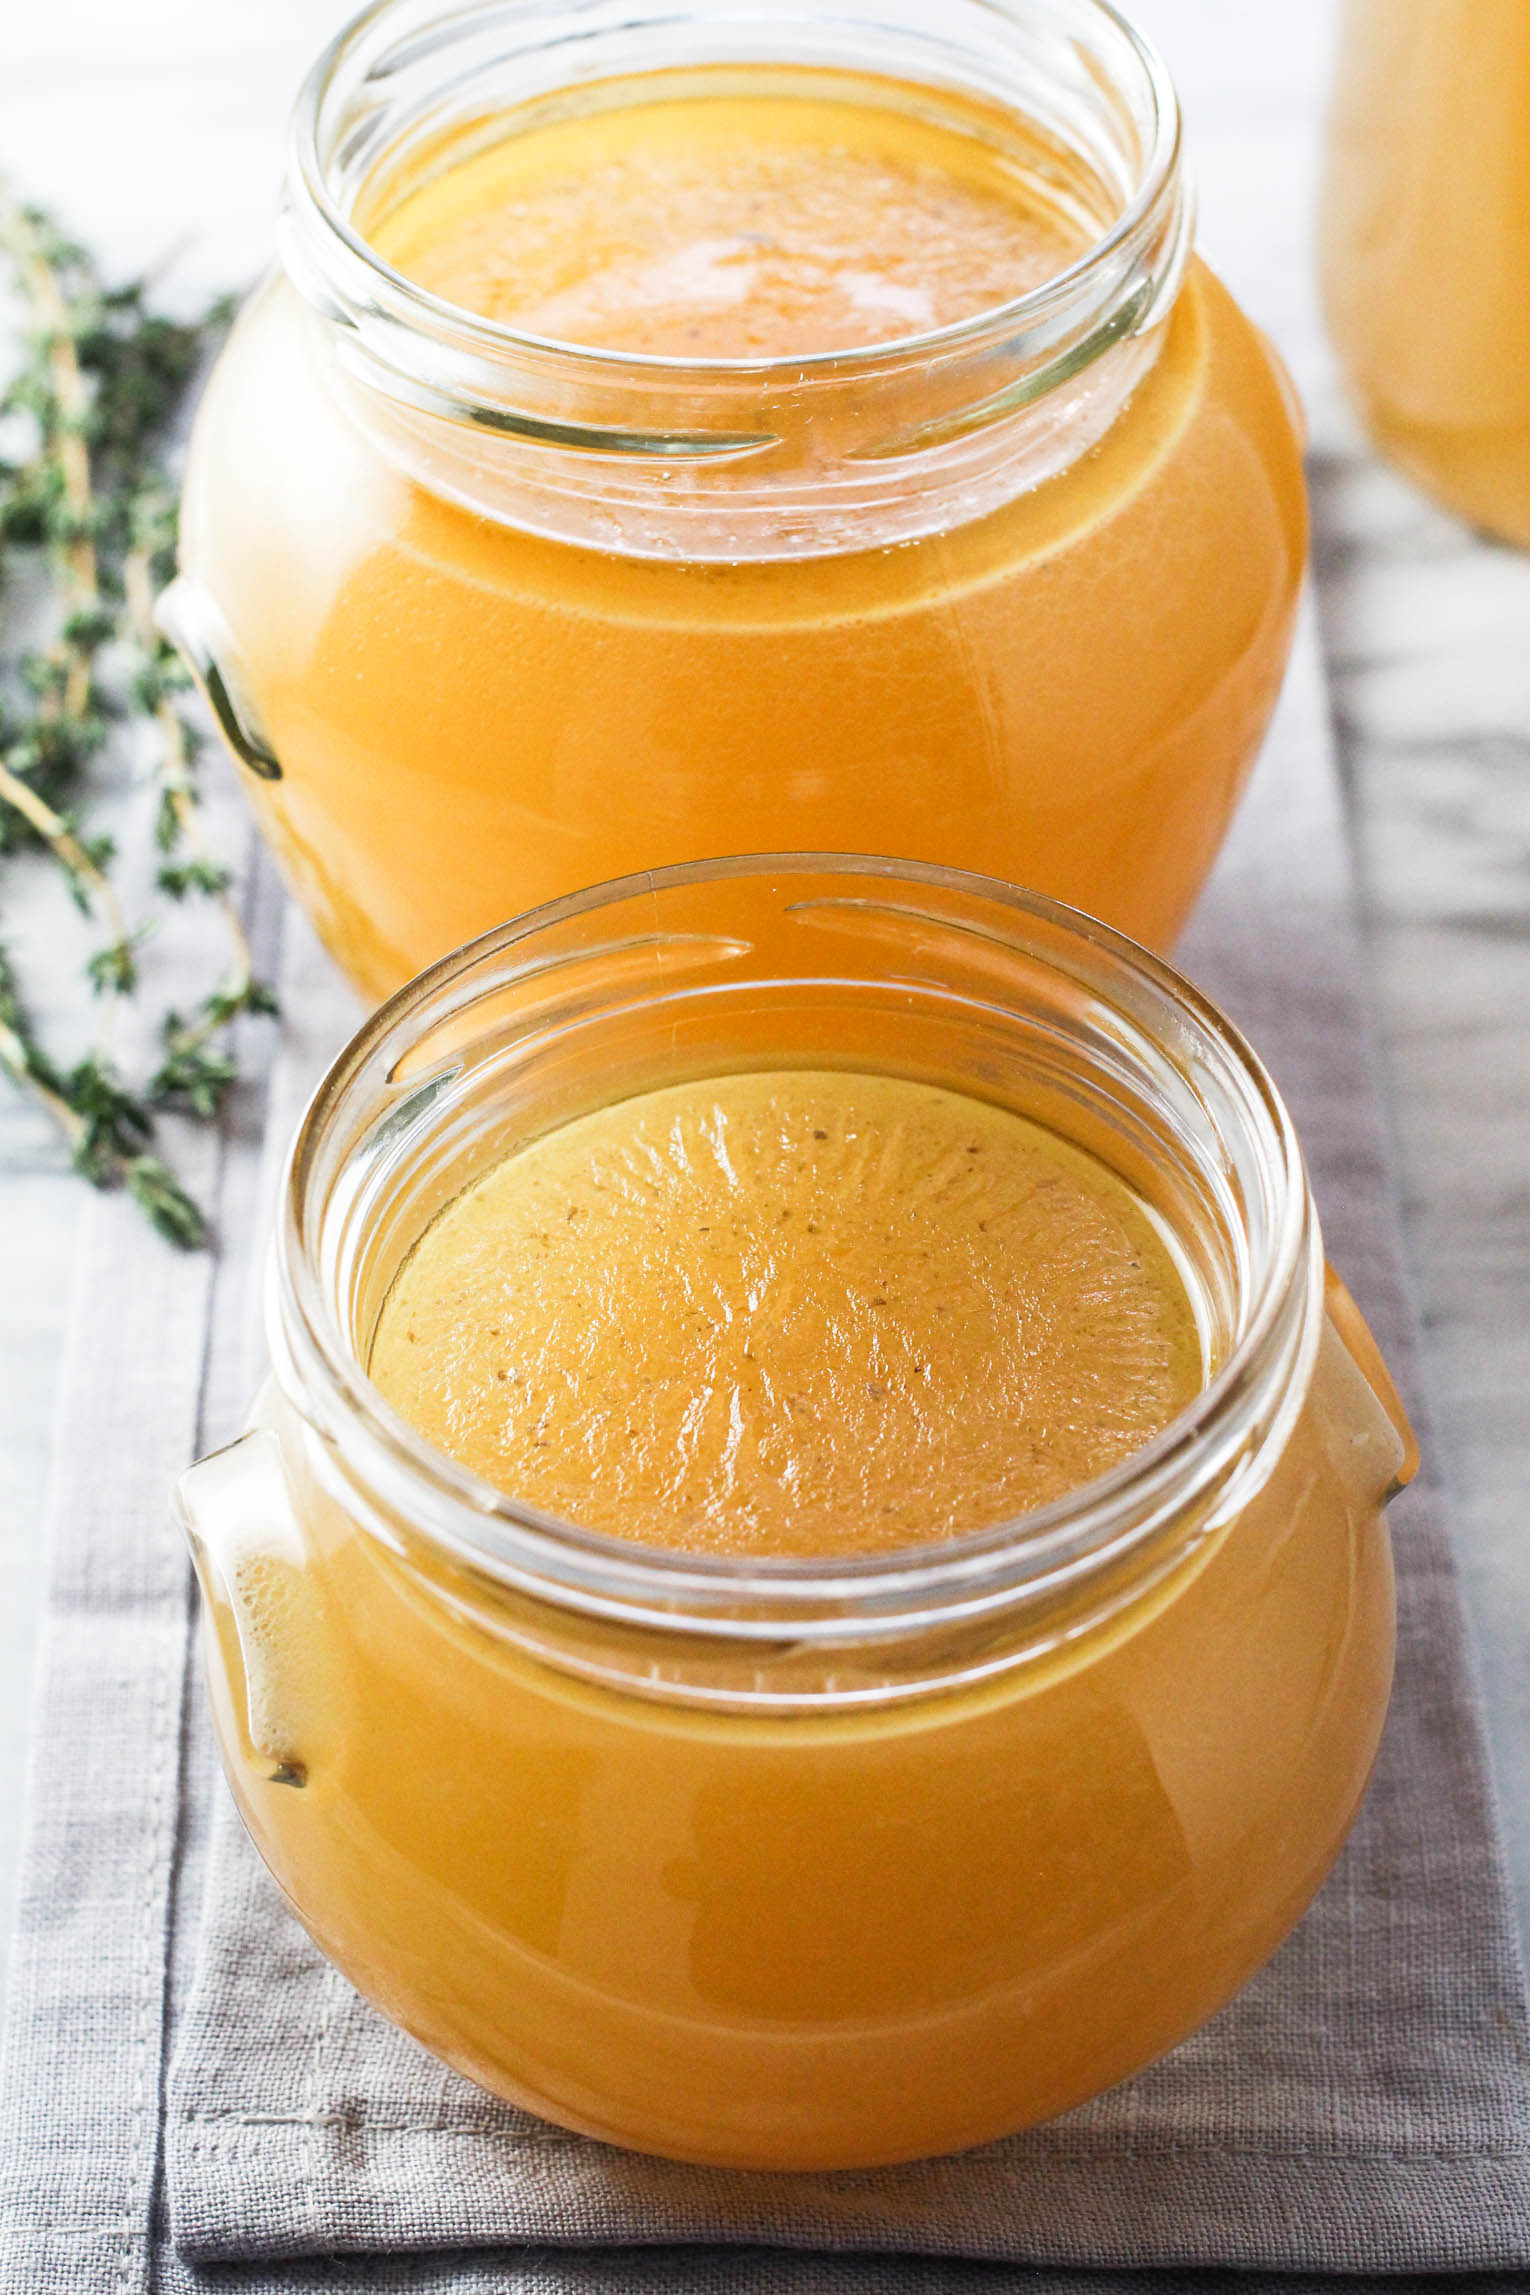
The high pressure and heat break down the bones more efficiently, releasing collagen and minerals while keeping the broth clean, golden, and intensely flavorful.
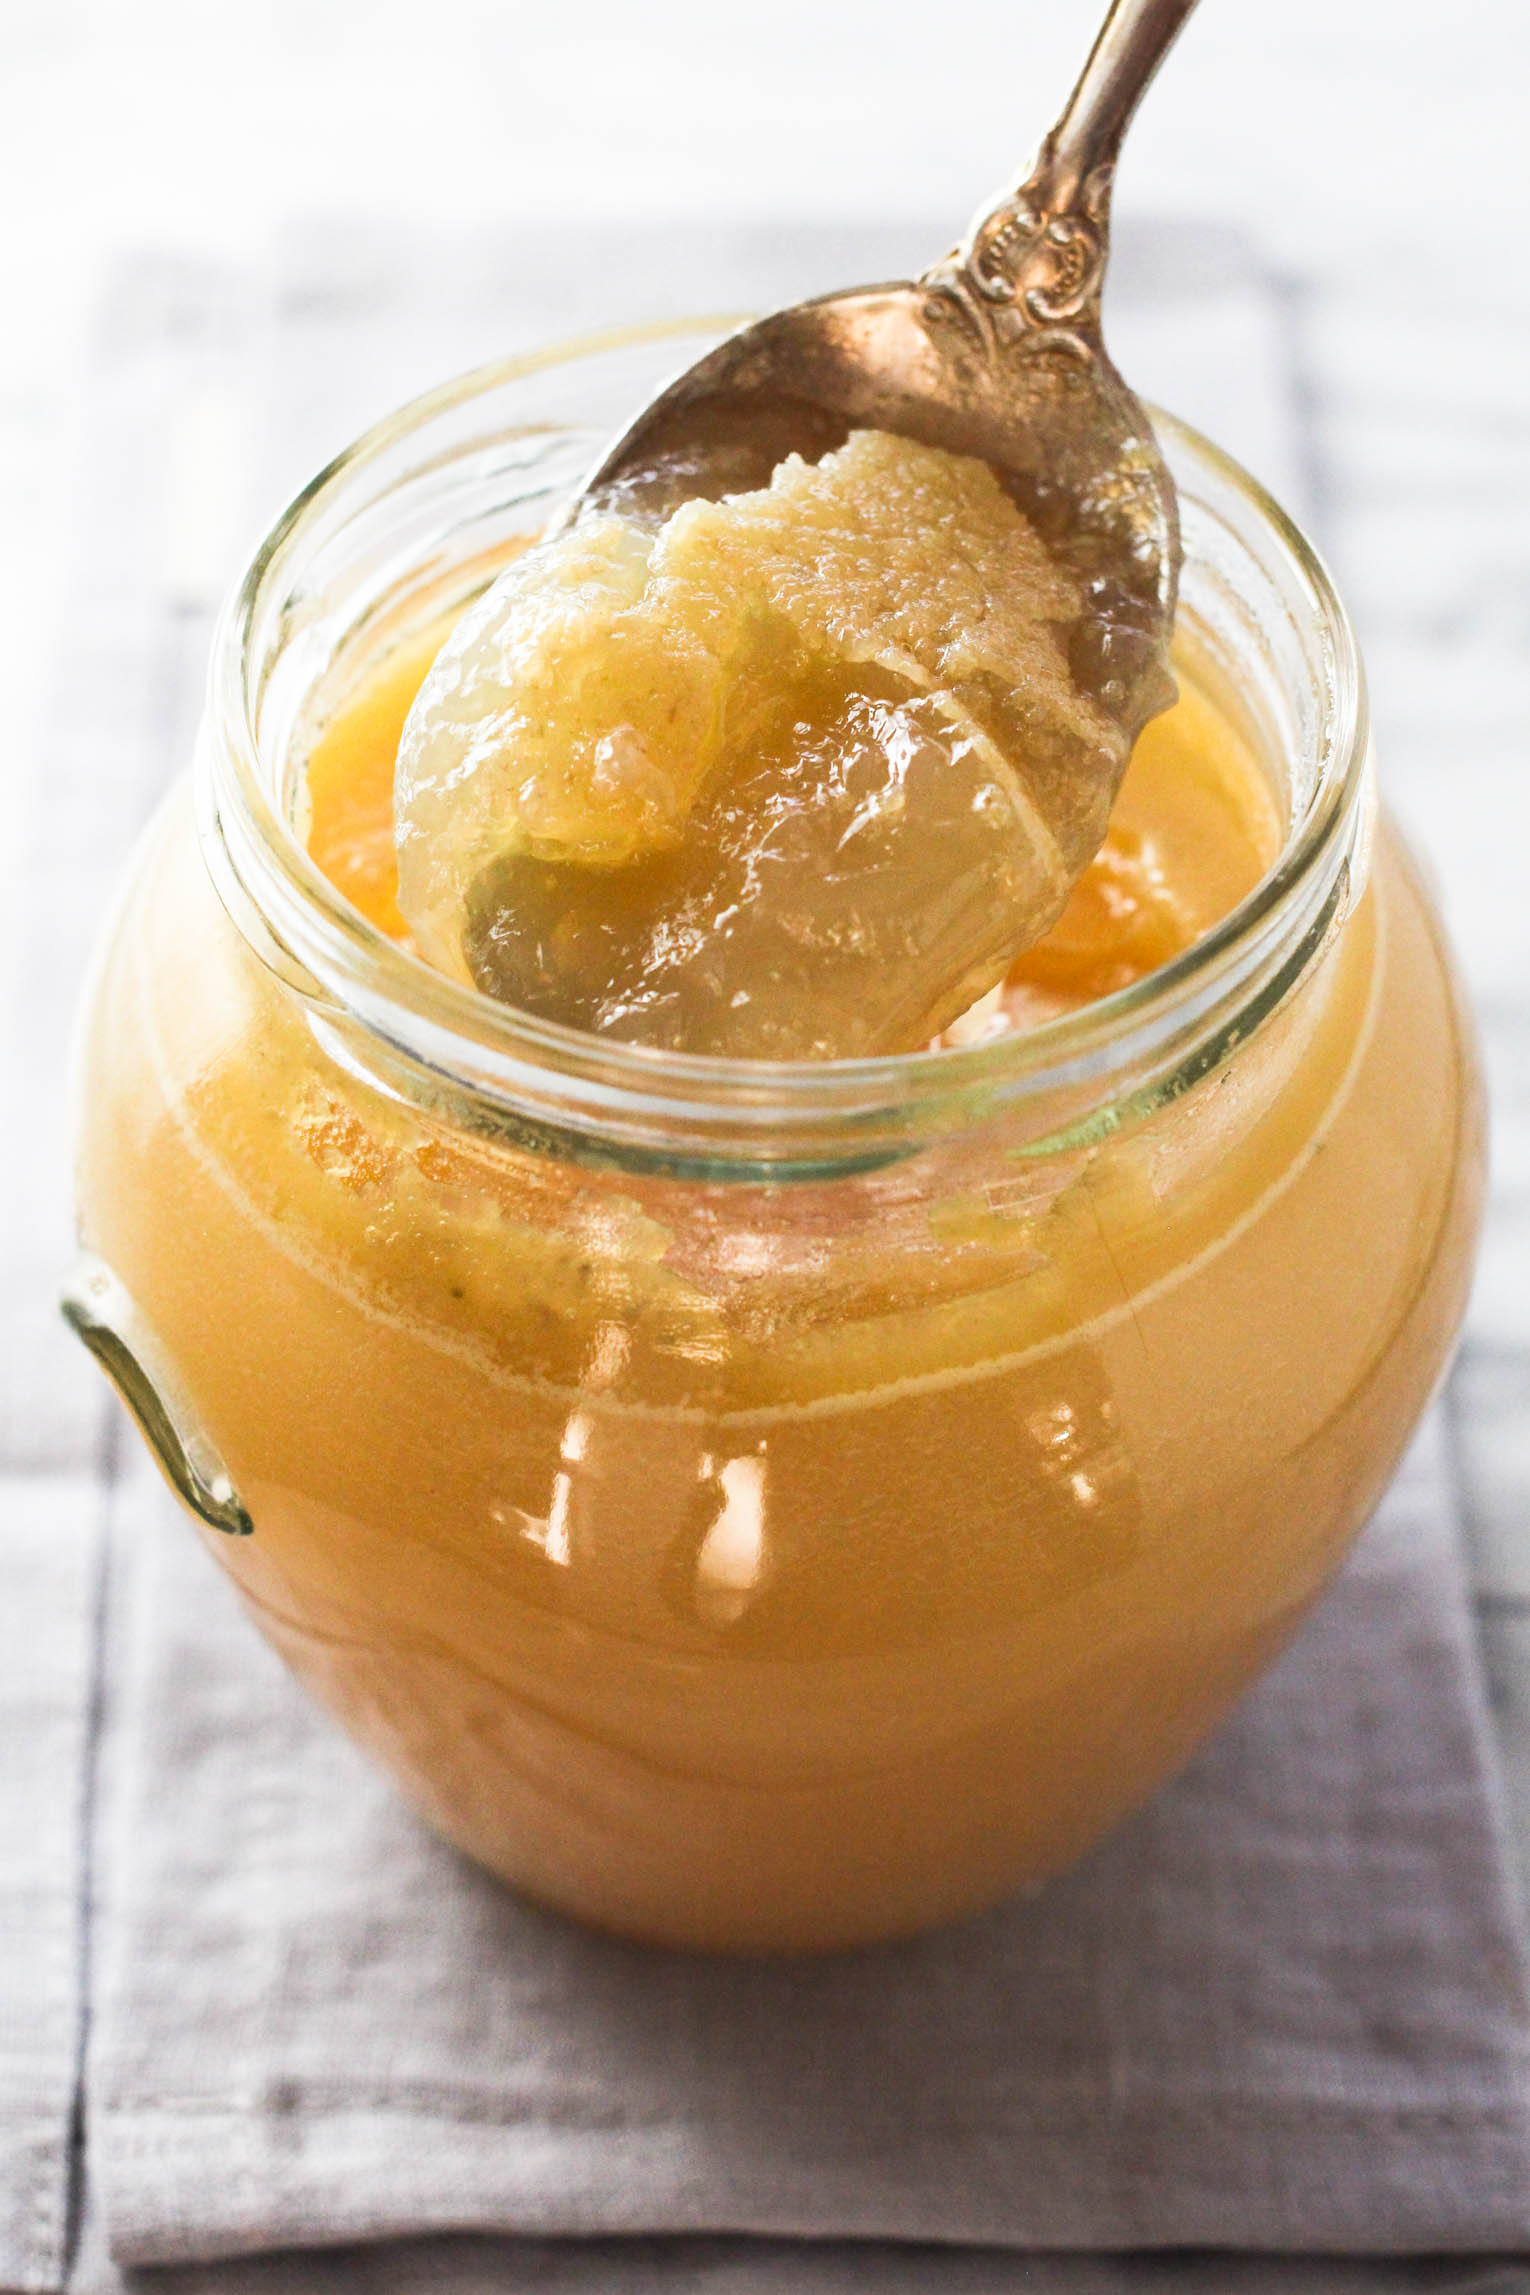
Because it’s richer than standard broth, this turkey bone broth is liquid gold in my kitchen: perfect for sipping, simmering, or upgrading everyday recipes with a nutritional boost and a deeper, more satisfying flavor than boxed stock ever could.
Why You’ll Love This Recipe
Here’s why making bone broth in your Instant Pot is the smartest way to make the most of your leftover holiday turkey:
- Time-saving. Pressure cooking drastically reduces the traditional 12+ hour simmer time yet still delivers that deep, slow-cooked flavor and classic bone broth silkiness.
- Nourishing. Bone broth is naturally rich in collagen, amino acids, and minerals.
- Versatile. You can use it anywhere you’d typically reach for chicken broth or sip it straight – it’s super soothing and satisfying, especially when you’re under the weather.
Ingredient Notes
Here is everything you’ll need:
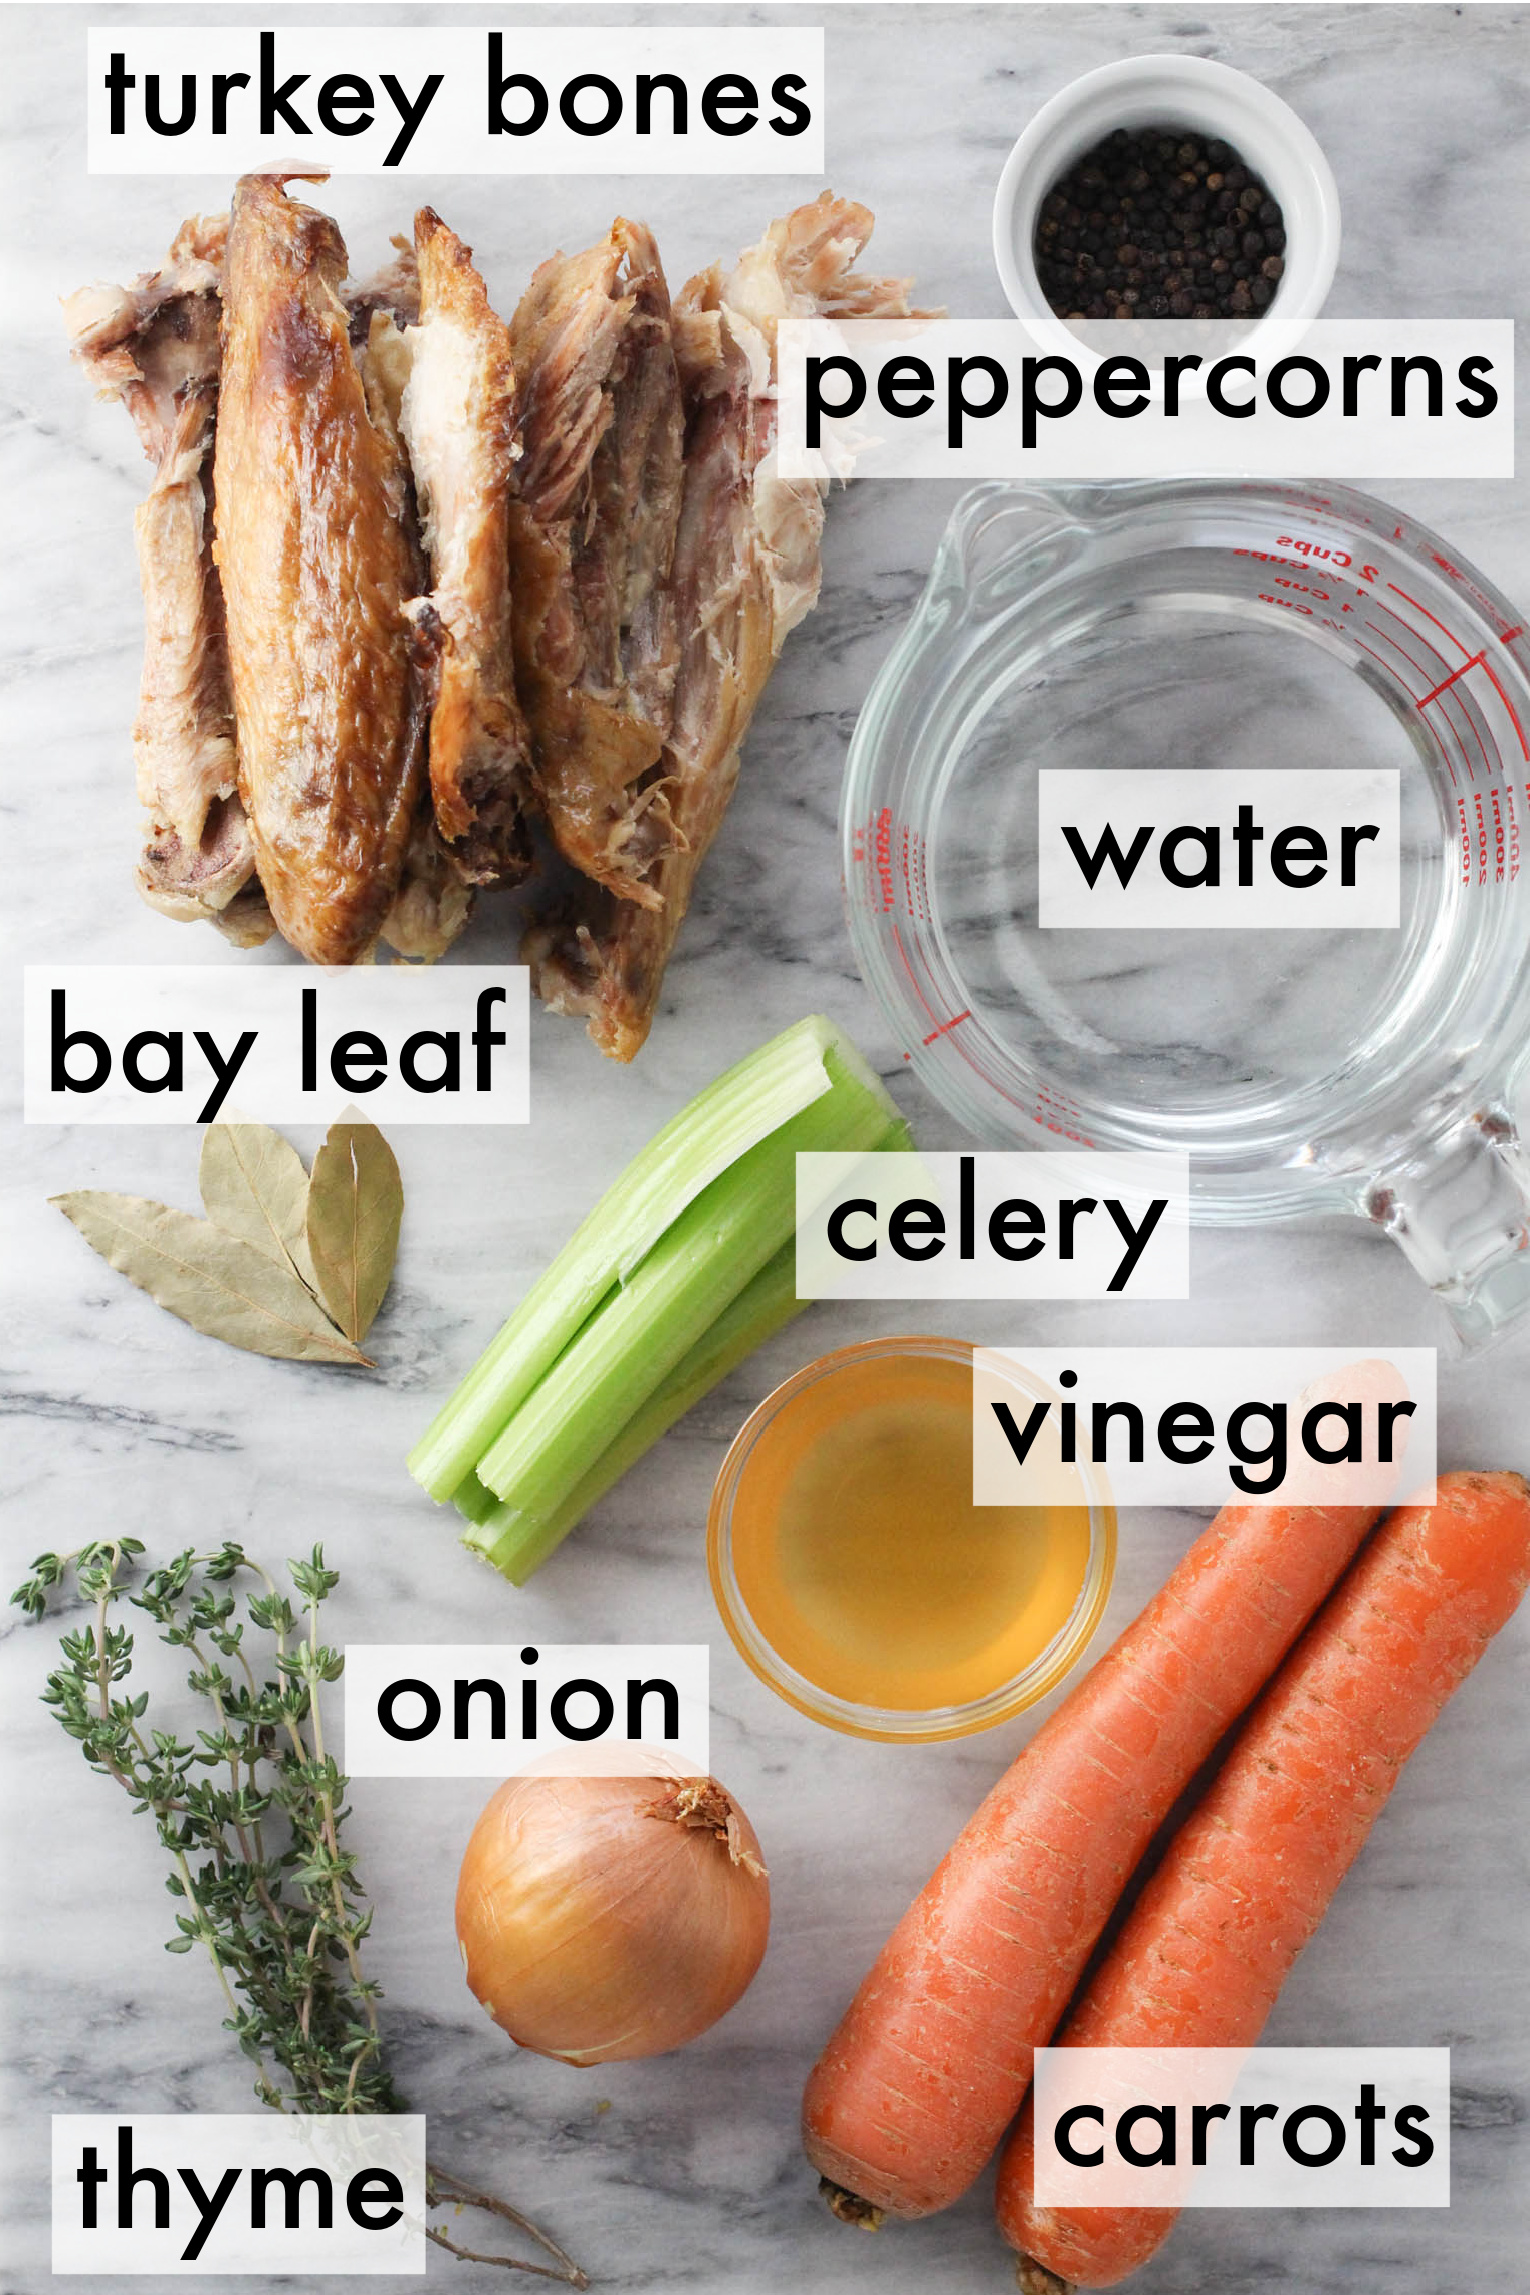
Here’s a quick look at the humble ingredients that make this homemade turkey bone broth so flavorful:
- Turkey bones – The bones are the broth’s source of collagen, minerals, and richness. You can use any part of the turkey here, including the carcass, wings, neck, skin, connective tissue, trimmings, and any meat still clinging to the carcass.
- Vegetables – Roughly chopped carrots, celery stalks, and onions add sweetness, depth, and body to the broth. Feel free to leave the onion skins on to give the broth a deeper golden color. They don’t need to look pretty since everything gets strained out later.
- Aromatics – I use bay leaf, whole peppercorns, and thyme sprigs to infuse that classic Thanksgiving-adjacent savory flavor. If you have rosemary, sage, or parsley stems, feel free to toss those in too.
- Apple cider vinegar – A small splash of apple cider vinegar helps draw minerals and collagen from the bones, resulting in an ultra-rich, slightly jiggly broth once it cools. Don’t worry, you won’t taste it in the final batch. Other acidic liquids, such as white wine vinegar, rice vinegar, or a squeeze of lemon juice, also work well here.
- Water – You’ll need enough cold water (preferably filtered) to just cover the bones. Make sure to add enough water for proper pressure cooking.
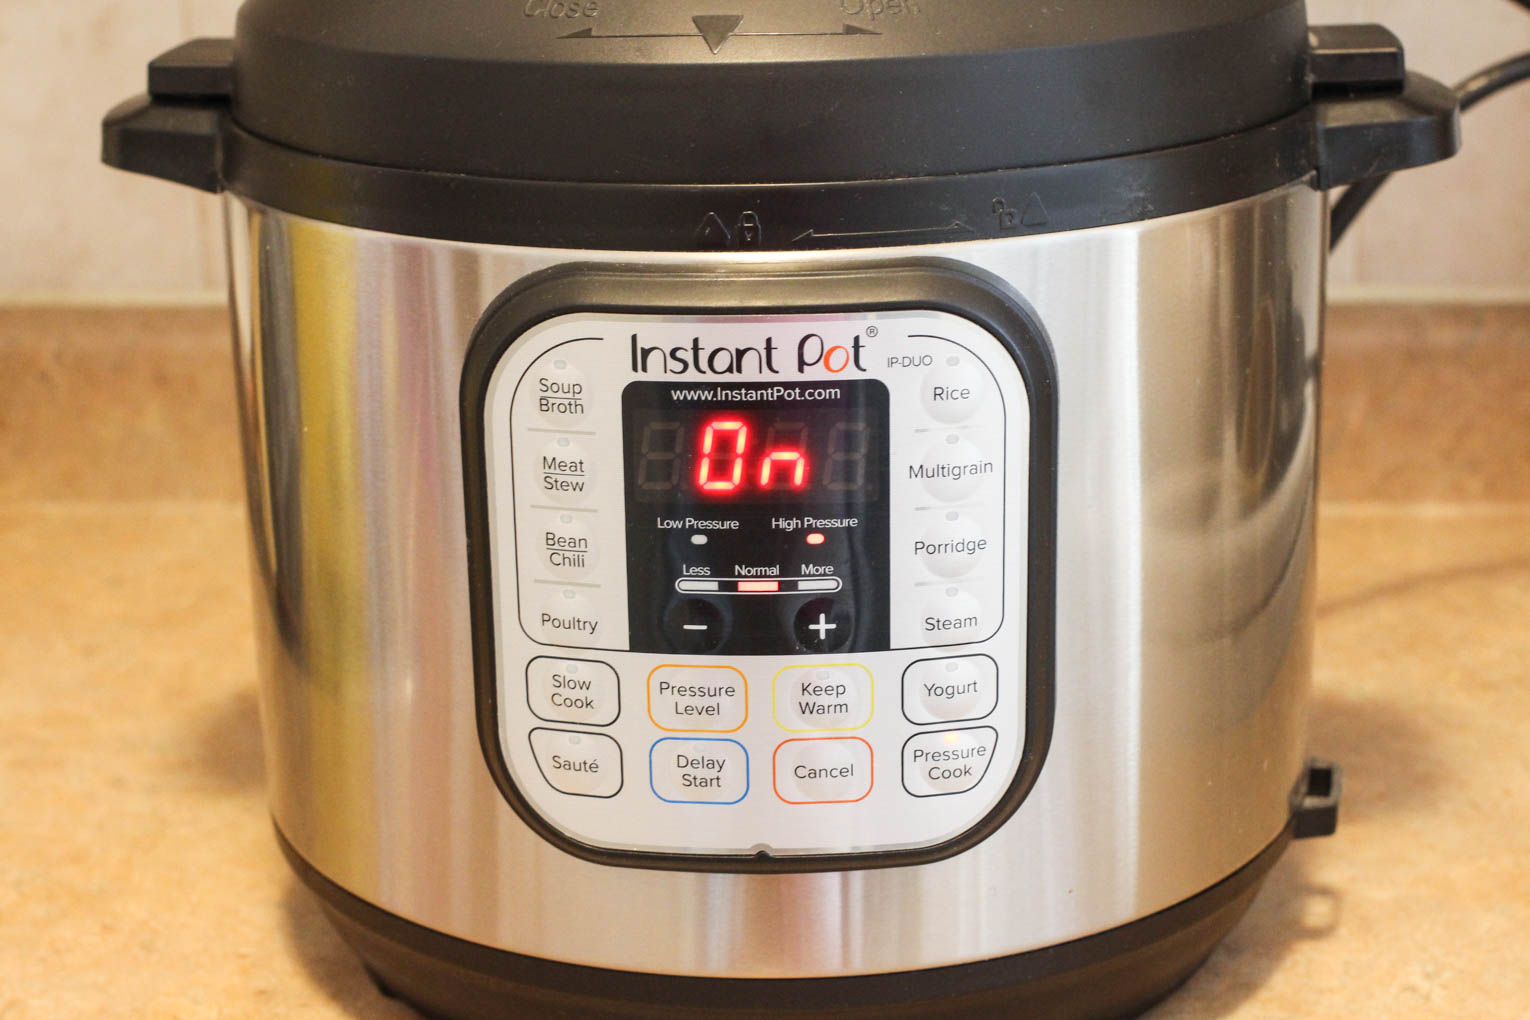
How to Make Turkey Bone Broth in the Instant Pot
Here’s how I make homemade turkey bone broth (but really, the Instant Pot does most of the heavy lifting):
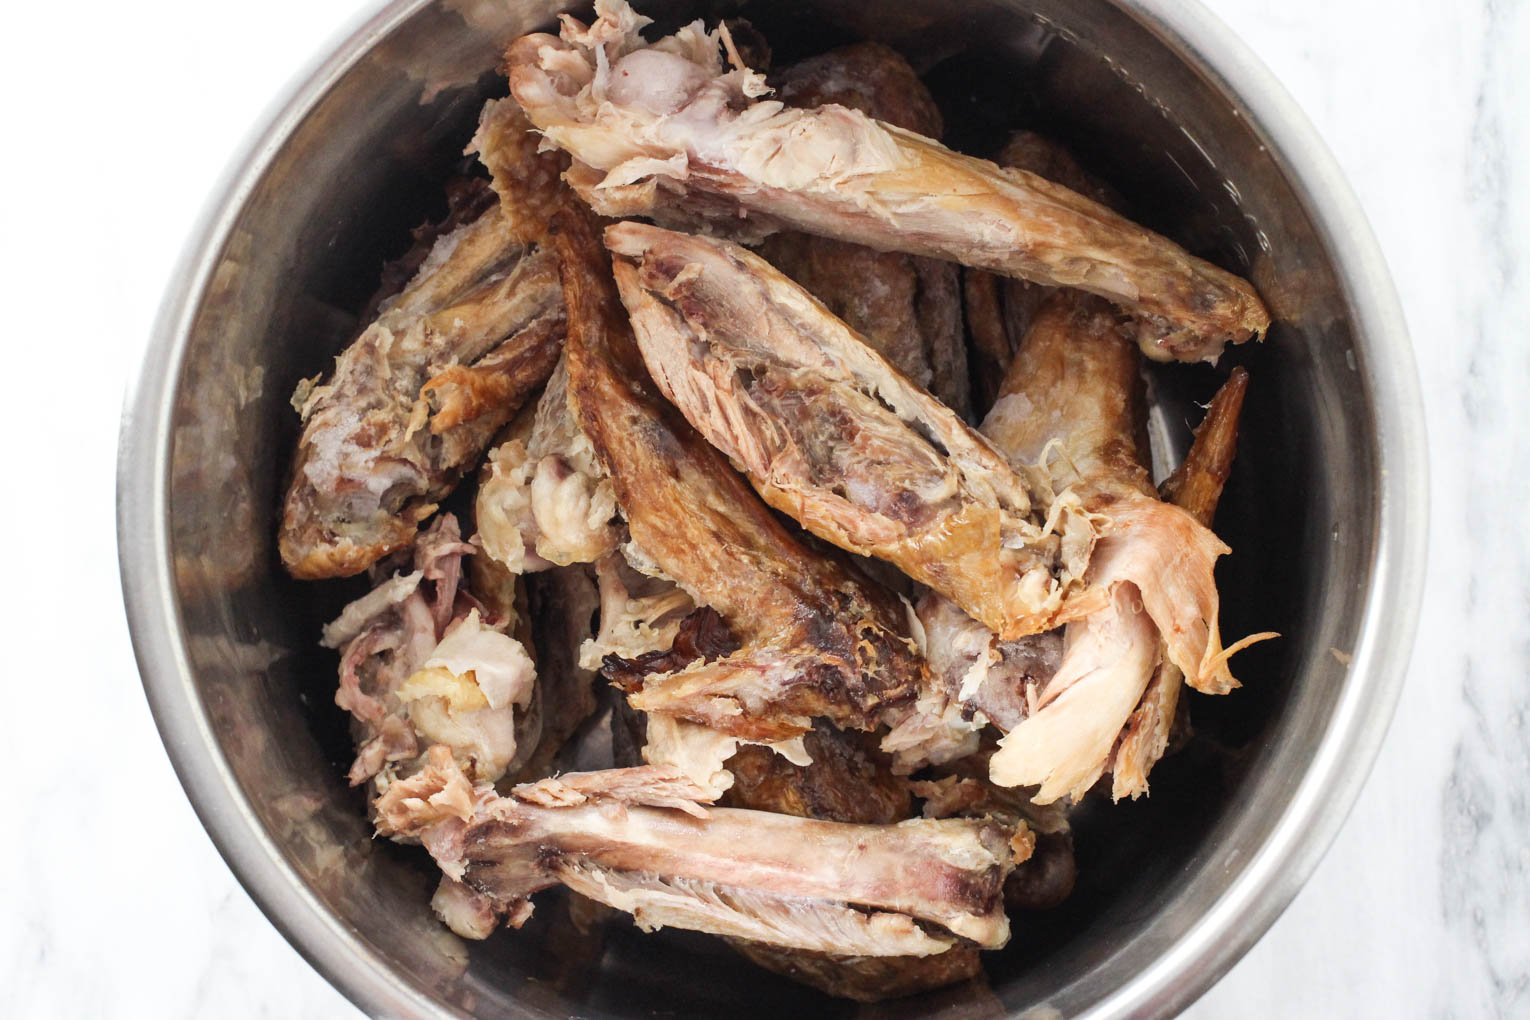
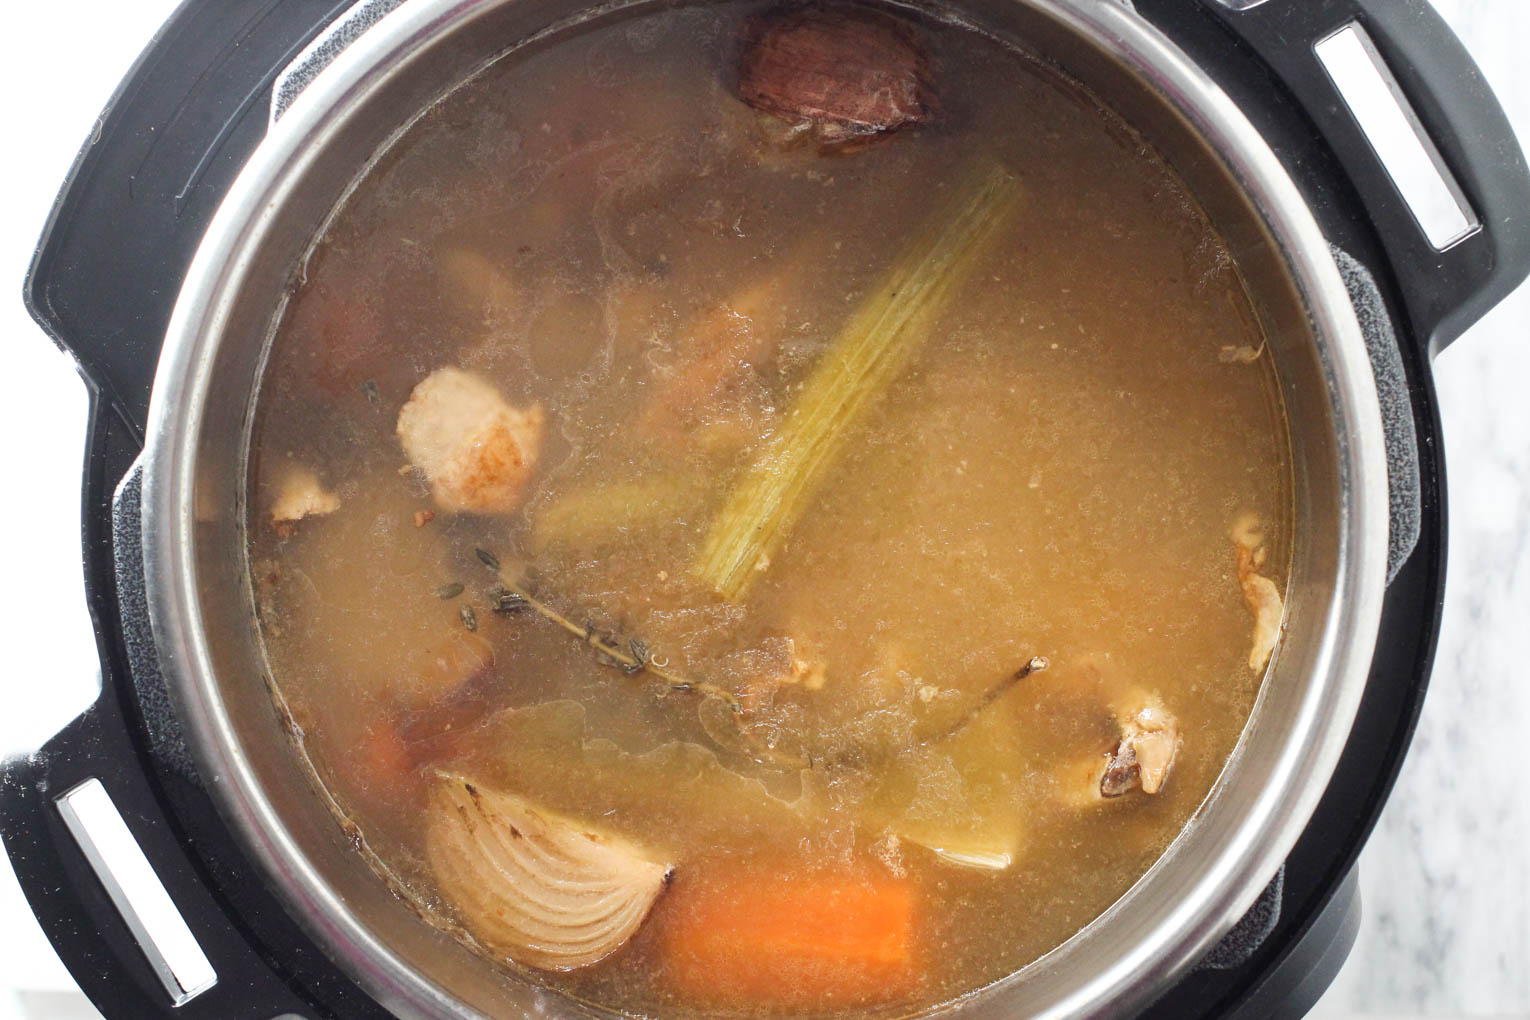
Step 1: Prepare the bones.
Start by breaking down any large bones so they fit comfortably in your Instant Pot. Then, add them all to the pot – the bones, wings, neck, skin, trimmings, etc.
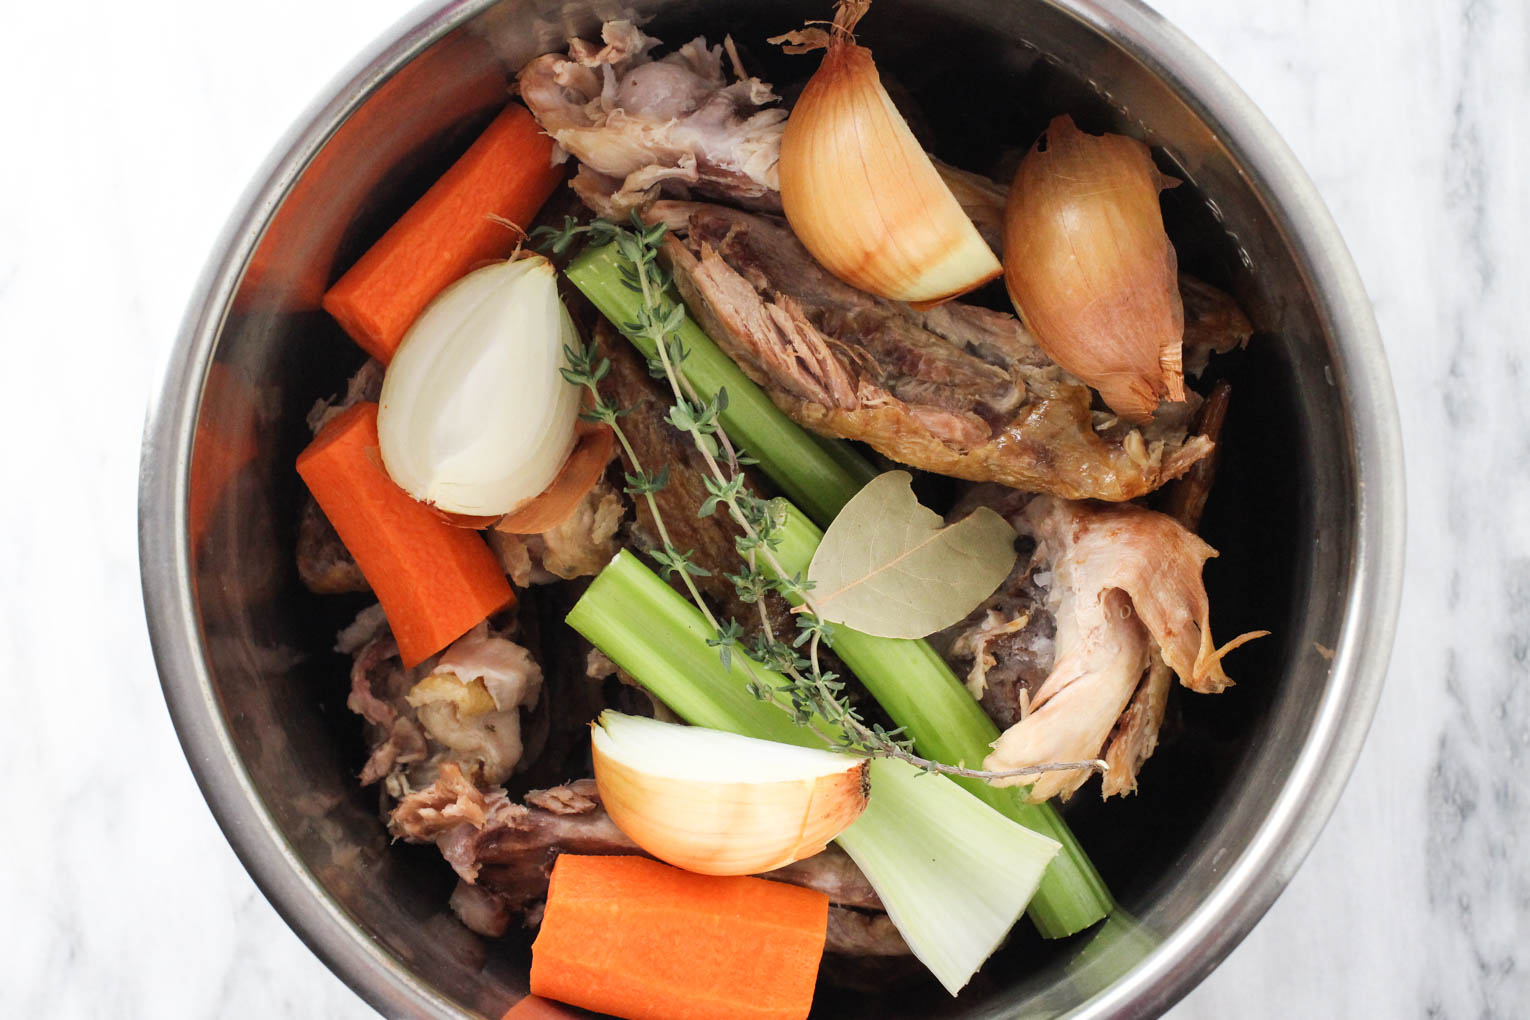
Step 2: Add the aromatics.
Layer the carrots, celery, onion, bay leaf, peppercorns, and thyme on top of the bones.
Step 3: Add the liquids.
Add the apple cider vinegar, then pour in cold water until everything is just covered, ensuring you don’t exceed the max fill line.
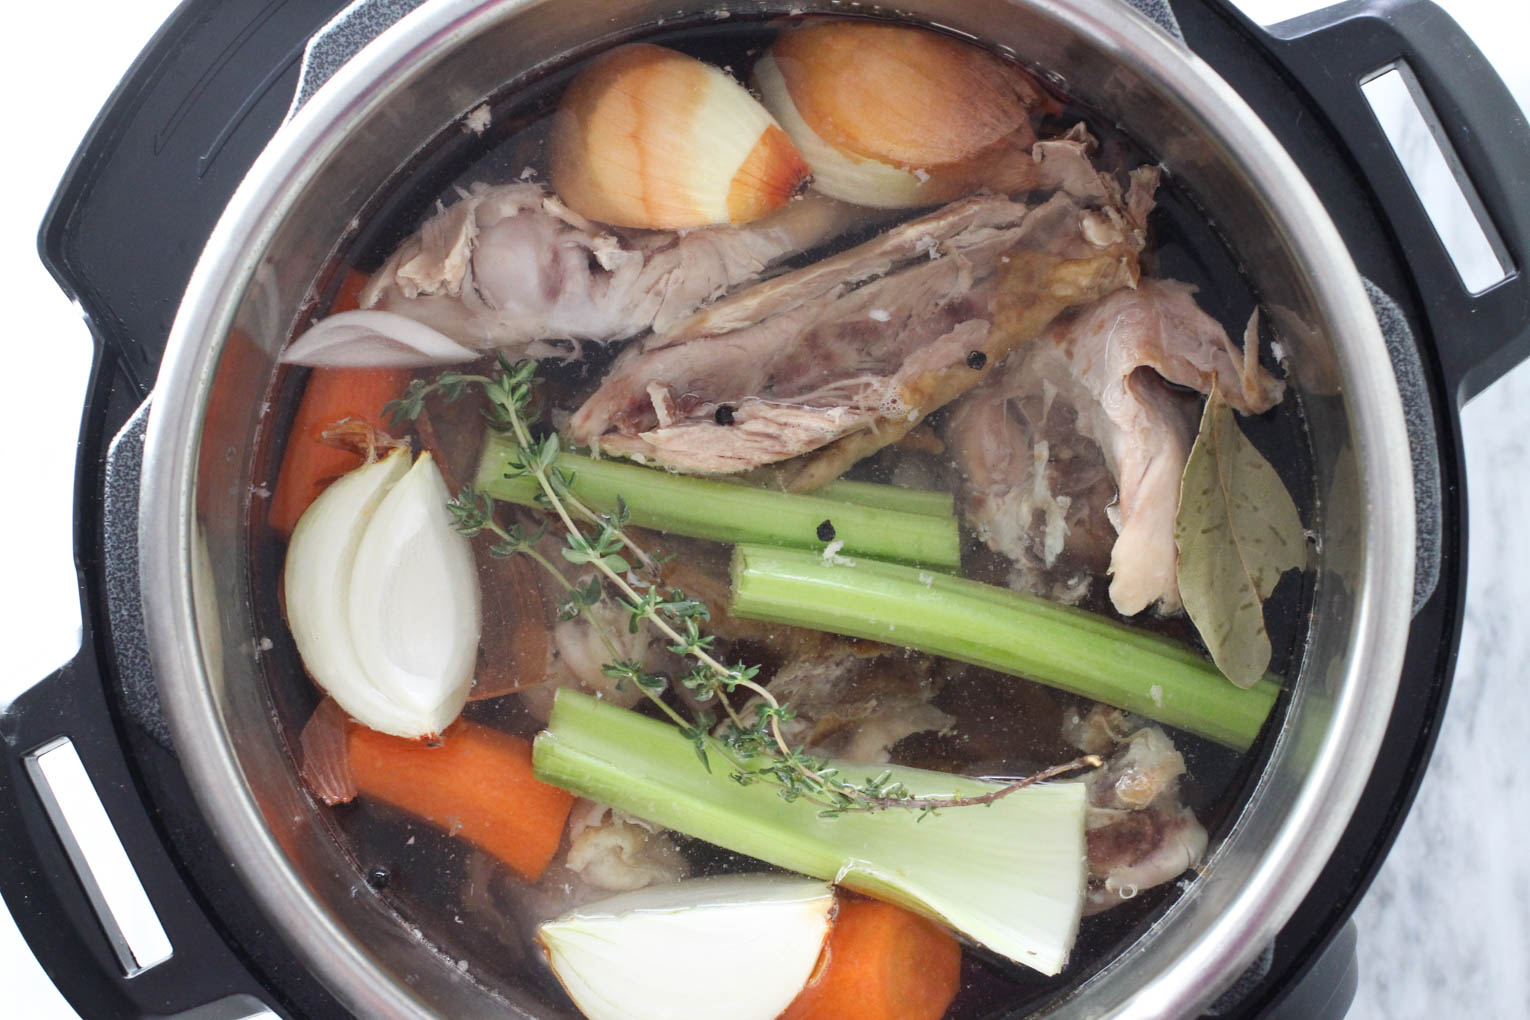
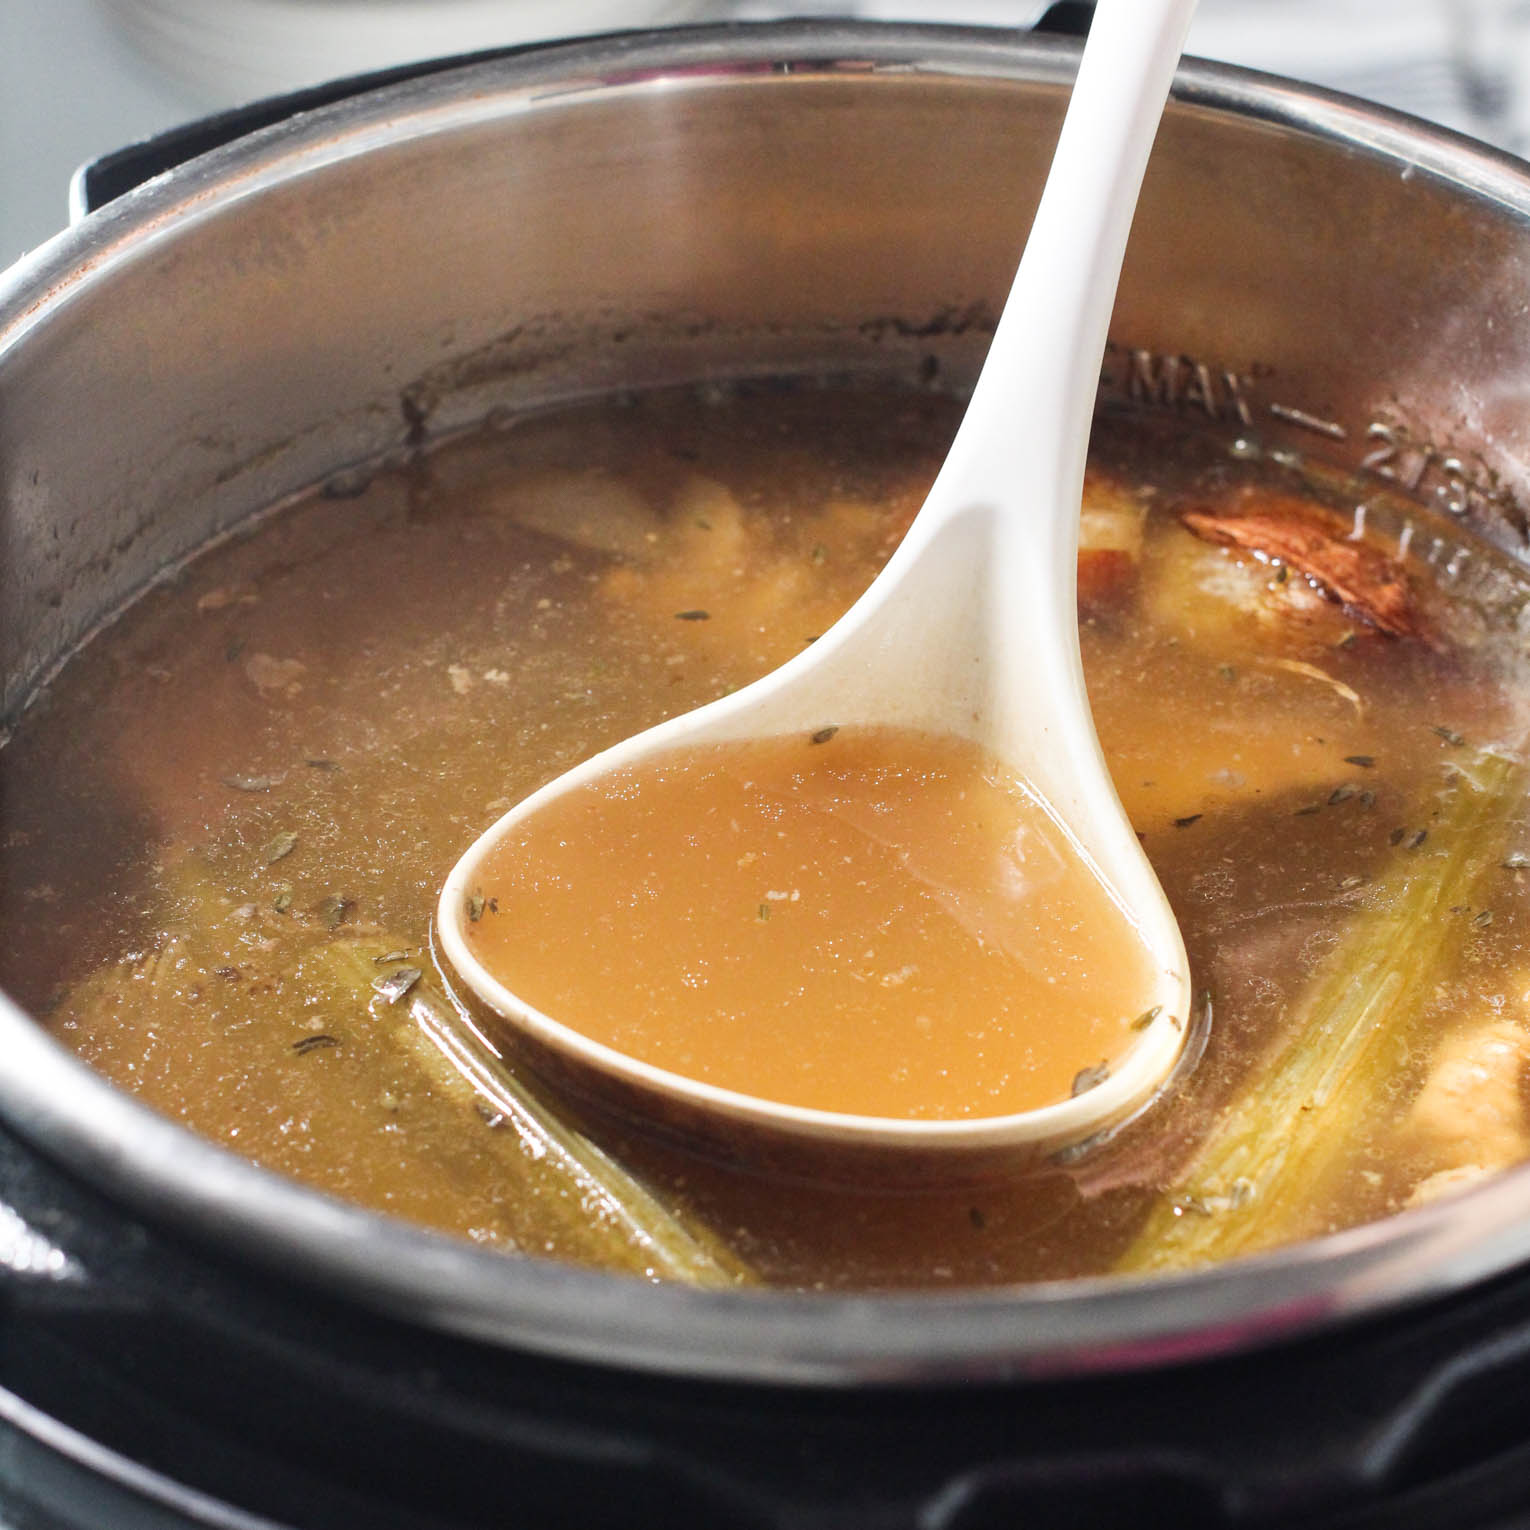
Step 4: Pressure cook.
Lock the lid and set the valve to the Sealing position. Cook on High Pressure for 120 minutes for the richest, most gelatinous broth. Or if you prefer a lighter, more sip-friendly version, reduce the cook time to 90 minutes.
Step 5: Natural release.
When the timer goes off, let the pressure release naturally.
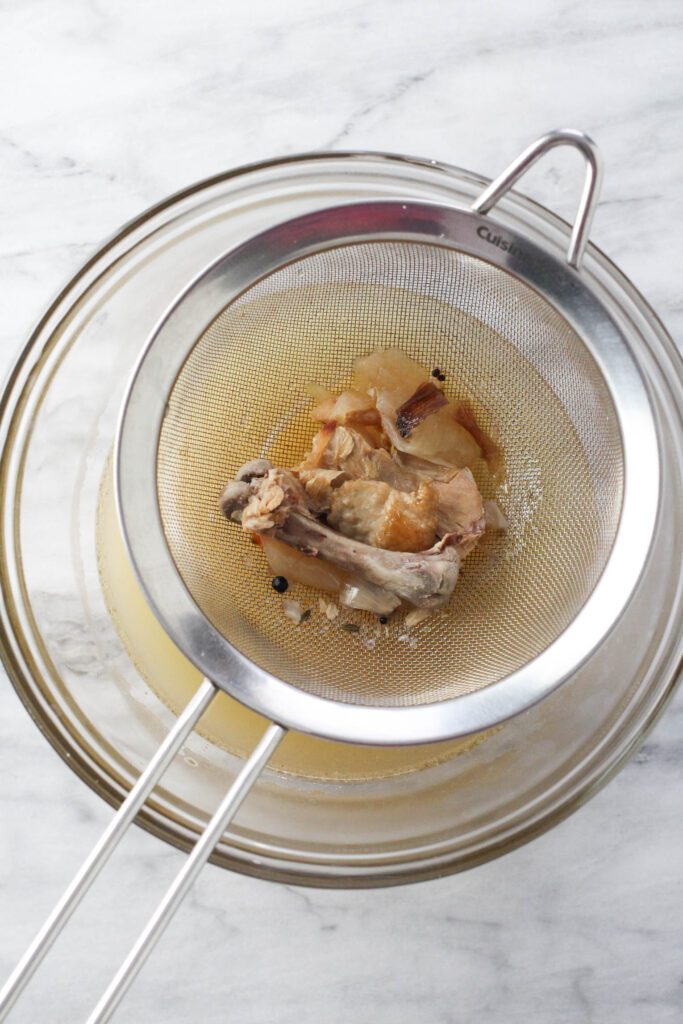
Step 6: Strain.
Once the broth is cool enough to handle, use tongs to remove the bones and vegetables. Then, strain the broth through a fine-mesh strainer into a large bowl or pot. Let the broth cool completely, then skim off the excess fat (or leave it for extra richness) before storing.
How to Get Double the Broth From One Turkey Carcass
You can actually pressure cook the same turkey bones twice and still get a second batch of flavorful, usable broth.
The second run won’t be as rich or as gelatinous as the first, but it’s far from weak. This simple method can nearly double the amount of broth you get from one leftover turkey carcass.
Why This Works
Even after the first pressure-cooking session, turkey bones still retain extractable collagen and flavor. The second batch captures what the first round leaves behind, stretching your leftover turkey bones much further without sacrificing quality.
It’s a simple way to reduce food waste and make the most of your ingredients.
The result is a lighter, more delicate broth. It won’t gel as firmly, but it’s excellent for cooking grains, making light soups, or using as a poaching liquid.
First Batch (Primary Broth)
Cook the bones at high pressure for 120 minutes. This produces a deeply flavorful, collagen-rich broth that sets into a natural gel when chilled. It’s perfect for sipping, hearty soups, and any recipe where you want bold, concentrated flavor.
Second Batch (Secondary Broth)
After straining the first batch, return the same bones to the Instant Pot right away. Add fresh vegetables and aromatics, cover with water again, and cook at high pressure for 60 to 90 minutes.
Recipe Tips
Here are all my top tips and pressure cooking tricks to help you nail making turkey bone broth in your Instant Pot every time:
- Break the bones for best results – A 6-quart Instant Pot will likely require breaking the carcass into several pieces, whereas an 8-quart model can usually accommodate larger bones. That said, don’t hesitate to crack bones even if they do fit. Breaking them exposes more collagen-rich surfaces, which means a silkier, more luxurious broth.
- Avoid overfilling the Instant Pot – Overfilling can prevent the pot from reaching pressure properly, leading to a cloudy broth. For safety and optimal flavor extraction, never fill the Instant Pot past its max fill line.
- Strain the broth for clarity – Straining the broth through a fine-mesh sieve gives you that clean, restaurant-style finish. Don’t skip this step, or your broth may contain small herb and vegetable bits that reduce its shelf life.
- Season with salt to taste – I keep my broth unsalted because I like having control over the seasoning when I use it in other recipes. If you do add salt, just keep in mind that the flavor concentrates as the broth cools, so it’s best to wait until then and season to taste.
Variations
Once you’ve mastered the basics of pressure cooker bone broth, you can easily modify the ingredients with what you have on hand or to customize the flavor profile. Here are a few variations to try:
- Use a different protein – This recipe works just as well with the bones and trimmings from chicken, duck, or beef, using the same basic bone-to-water ratio.
- Add-ins for extra depth – Boost flavor by incorporating additional aromatic ingredients, such as parsnips, leeks, mushrooms, garlic cloves, fresh herbs or even a strip of lemon peel for brightness.
- Global flavor inspiration – Try adding star anise, ginger, and scallions for a pho-like flavor. Go for cilantro stems, lime peel, and chili flakes for a Mexican-inspired vibe. Or try kombu, dried bonito, and dried shiitake for a broth reminiscent of ramen.
How to Use Turkey Bone Broth
The beauty of this homemade turkey broth is that it’s flavorful enough to sip on its own yet versatile enough to use anywhere you’d normally use chicken or vegetable broth. Here are some of my favorite ways to use it:
- Soups and stews – Use this delicious broth as the base for classics like turkey noodle soup, chicken and rice soup, or hearty vegetable stew. Or use it as a blender liquid in creamy soups.
- Grain cooking liquid – Swap water for turkey bone broth when cooking rice, quinoa, farro, barley, millet, or couscous to infuse the grains with savoriness.
- Mashed potatoes – Replace half of the milk or cream with warm bone broth for a lighter, more flavorful mash that still tastes rich and buttery.
- Gravy or pan sauce – Use it to deglaze your roasting pan or whisk it into drippings for a silky, collagen-rich gravy.
- Casseroles – Use it as the liquid base in turkey tetrazzini, stuffing, or other comforting dishes like these Stuffed Bell Peppers for moisture and depth.
- Sautéed greens – Splash a bit into the pan while sautéing kale, spinach, chard, or beet greens to steam and season them simultaneously.
How to Substitute Bone Broth in Recipes
To help you get the most out of your homemade broth, here’s a simple guide for swapping it into common dishes:
|
Recipe Type |
Typical Liquid Used |
How to Substitute Bone Broth |
|---|---|---|
|
Grains |
Water |
Replace 100% with bone broth (or 75% if very concentrated, topping up with water) |
|
Mashed potatoes |
Milk or cream |
Replace 50% with warm bone broth |
|
Soups |
Store-bought broth |
Replace 100% with bone broth (or 75% if very concentrated, add water) |
|
Braising liquid |
Wine+Water |
Replace the water portion only |
|
Deglazing pans |
Wine or water |
Use bone broth instead |
Quick Tip: Bone broth is naturally rich and flavorful. For very concentrated broths, dilute with a bit of water when using for grains or soups, and always taste and adjust seasoning as needed.
Storing & Freezing
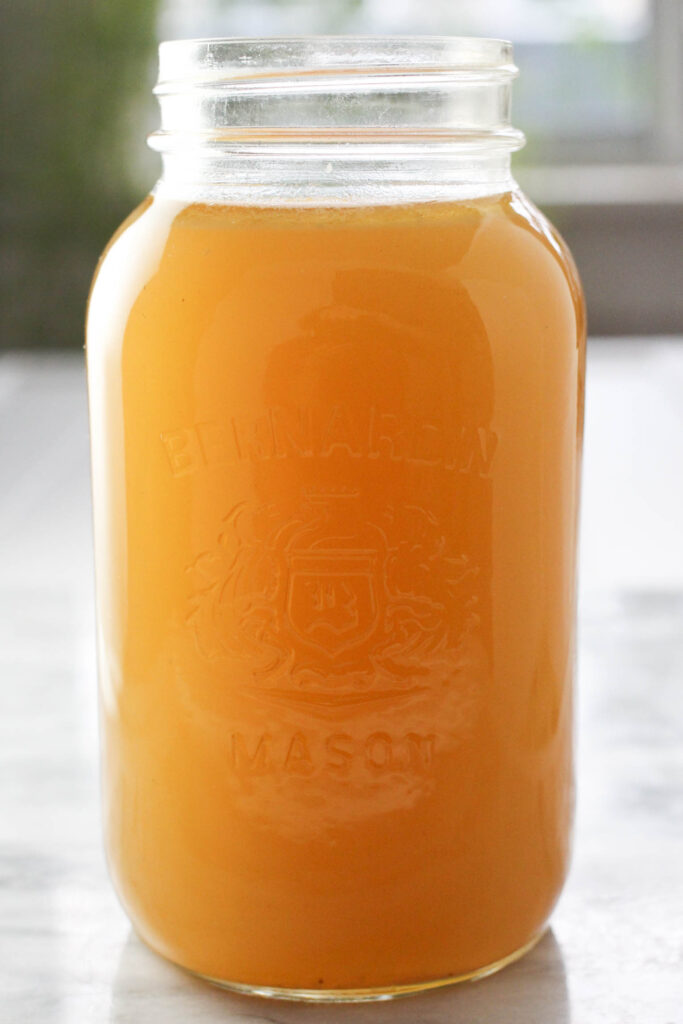
Storing: Let your turkey bone broth cool completely and refrigerate in tightly sealed glass Mason jars for up to 5 days.
Quick Tip: The fat that rises and solidifies on top acts as a natural seal, helping your broth stay fresh longer. Leave it until you’re ready to use the broth.
Freezing: You can freeze leftover turkey bone broth in quart containers, silicone molds, ice cube trays, or flat in freezer bags for up to 6 months. Be sure to leave space for future expansion.
Reheating: If the broth is frozen, thaw it overnight in the refrigerator. Then, simply pour the broth into a small pot and gently warm it over medium heat until steaming.
FAQs
More Turkey Recipes You’ll Love
Once you’ve mastered this bone broth, you’re going to want to try these delicious turkey recipes next:
Instant Pot Turkey Bone Broth (From Leftover Turkey Carcass)
Equipment
- Instant Pot (6 or 8 qt)
Ingredients
- 2-3 pounds turkey bones (carcass, wings, neck, and any leftover bones; do not exceed the Instant Pot max fill line)
- 1-2 medium carrots (roughly chopped)
- 1-2 celery stalks (roughly chopped)
- 1 onion (quartered)
- 1 bay leaf
- 10 whole peppercorns
- 2 thyme sprigs
- 2 Tbsp apple cider vinegar
- 10-12 cups water (enough to cover the bones but not exceed the Instant Pot max fill line)
Instructions
- Prepare the bones: Break any large bones so they fit comfortably in your Instant Pot.
- Add the bones, wings, neck, and any turkey leftovers, such as skin and trimmings, to the Instant Pot.
- Add the vegetables and aromatics: Place the carrots, celery, onion, bay leaf, peppercorns, and thyme on top of the bones.
- Add the vinegar and water: Pour in the apple cider vinegar. Add cold water until the bones are just covered. Do not exceed the max fill line.
- Pressure cook: Secure the lid and set the valve to “Sealing.” Cook on High Pressure for 120 minutes (2 hours) for a rich, flavorful broth. Optional: For a lighter broth, 90 minutes is sufficient.
- Natural release: Allow the Instant Pot to naturally release pressure.
- Strain: When the broth is cool enough to handle, carefully remove bones and vegetables with tongs. Strain the broth through a fine-mesh sieve into a large bowl or pot.
- Store: Cool the broth. Refrigerate for up to 5 days in a glass jar with a tight lid. Freeze for up to 6 months.
Recipe Notes
Reuse the Bones
After straining the first batch, you can use the same turkey bones for a second round of broth. Add fresh vegetables and water, pressure cook again for 60–90 minutes, and you’ll get a lighter but still flavorful broth.Tips
- Break the bones – Crack the carcass to fit into your Instant Pot.
- Don’t overfill – Never fill past the max line of the Instant Pot.
- Strain well – Strain through a fine-mesh sieve for a clear broth and longer storage life.
- Salt at the end – Keep the broth unsalted to add to other recipes or season after cooling.
Storing & Freezing
- Refrigerate – Cool completely and store in sealed jars for up to 5 days. Don’t skim the fat right away – it forms a natural seal that keeps the broth fresh in the fridge.
- Freeze – Freeze in containers, molds, or freezer bags for up to 6 months, leaving room for expansion.
- Reheat – Thaw overnight in the fridge, then gently warm on the stove until steaming.
The nutrition facts are an estimate. Variations in ingredient brands, portion sizes, or substitutions can affect the final nutritional values. For the most accurate information, please use a nutrition calculator or consult with a healthcare provider. Always ensure that each of the ingredients is allowed in your diet.

Meet Maria
Maria Ushakova is a holistic nutritionist and food blogger. She focuses on developing easy recipes using real food ingredients. She believes that healthy food is delicious and anyone can learn how to cook it. Maria’s work has appeared on numerous popular websites as well as in print.