This chocolate ice cream recipe doesn’t call for eggs, dairy, or sugar, yet it is rich, creamy, and sinfully sweet. It’s hard to believe it’s vegan. So make a batch today to stash in the freezer for whenever you’re craving something sweet.
No eggs? No worries. This dark chocolate ice cream is egg-free, dairy-free, and refined sugar-free, but you’d never know the difference.
In this post, I’ll walk you through how to make vegan ice cream from scratch without churning or an ice cream maker.
Instead, you will need a durable food processor, a muffin pan, and about 15 minutes of your time to whip up a luxurious batch of delicious homemade chocolate ice cream.
It’s almost as easy to make as it is to grab a pint from the store.
If you’re new to my no-churn approach to homemade ice cream, let me catch you up.
First, you’ll make an ice cream base from coconut milk, flavoring agents, and a thickening agent (in this case, arrowroot powder).
From there, you’ll freeze the mixture into cups using a muffin tin.
Then whenever you want a scoop of chocolate ice cream, pop the frozen cup in the food processor, give it a quick spin, and your ice cream is ready to serve!
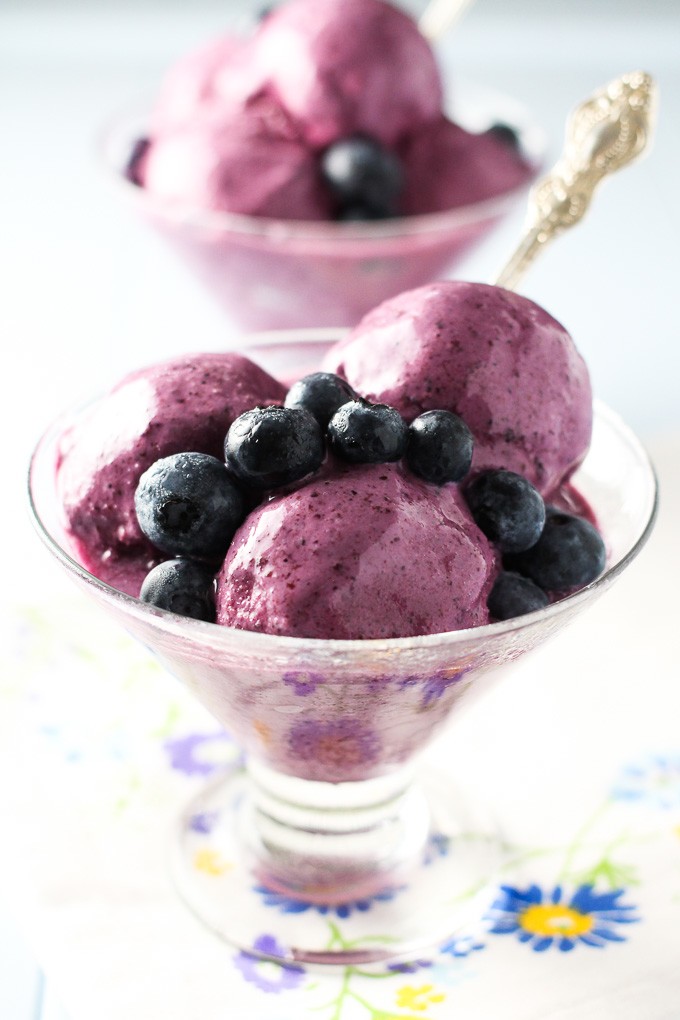
Don’t miss my homemade mango, raspberry, or blueberry no-churn ice cream recipes while you’re here -but first, CHOCOLATE.
Why You’ll Love This Recipe
- This chocolate ice cream recipe has no eggs, no dairy, and no refined sugars.
- It’s a healthier alternative to high-sugar and high-fat ice cream.
- No ice cream maker and no tedious churning are needed.
- This easy chocolate ice cream recipe is made with simple ingredients.
- You can use this egg-free ice cream as a canvas for any ice cream flavor.
Ingredients You’ll Need
- Full-fat coconut milk – This is key to making creamy ice cream with no eggs. For the best results, use a can of coconut milk with a thick layer of coconut cream at the top, so buy a can of coconut milk with only coconut, water, and guar gum.
- Unsweetened baker’s chocolate – A quality bar of baker’s chocolate works best for the rich chocolate flavor. I do not suggest using chocolate chips as they contain stabilizers, so they do not melt smoothly.
- Arrowroot powder – Arrowroot is a grain and gluten-free flour that comes from the starchy matter extracted from the tropical Arundinacaea plant. Please do not substitute cornstarch! Your ice cream won’t be nearly as silky smooth.
- Maple syrup – Sweetens the ice cream and adds flavor. You can also use date syrup or agave nectar.
- Vanilla extract – Use pure vanilla extract with at least 35% alcohol. The alcohol helps stabilize the ice cream mixture, so it stays soft and creamy and prevents the formation of ice crystals.
- Sea salt – Adding a pinch of salt improves and rounds out the rich, dark chocolate flavors.
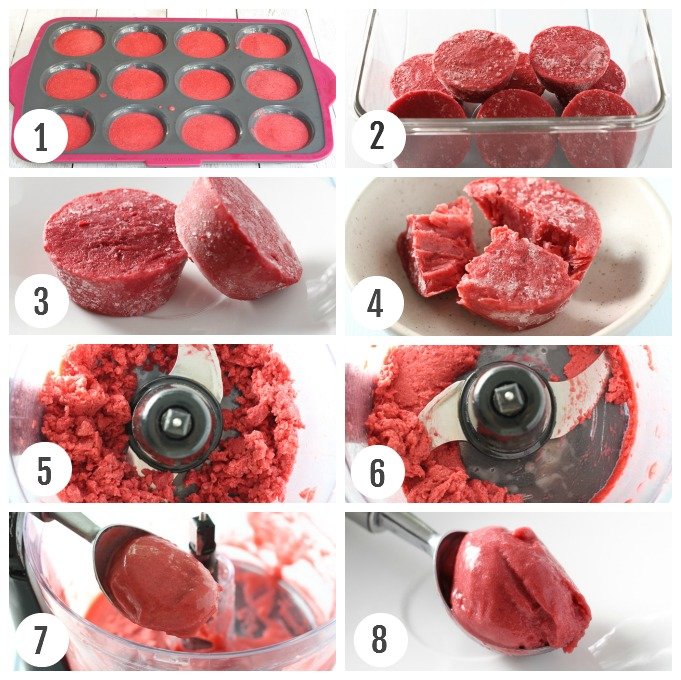
How To Make Chocolate Ice Cream Without Eggs
- Make the ice cream slurry: When you open the can of coconut milk, the solidified layer at the top is the “coconut cream,” and the milky liquid underneath is the “coconut water.” So dump the whole can into a medium saucepan and scoop a few tablespoons of the coconut water from the saucepan into a small bowl. Add the arrowroot powder to the bowl and whisk until smooth. Set aside.
- Combine the chocolate and coconut milk: Add the chocolate to the saucepan with the remaining coconut milk and warm over medium heat. Stir constantly with a wooden spoon until the chocolate softens, then switch to a wire whisk and whisk until the chocolate is fully melted and incorporated.
- Add the flavoring and thickening agents: Add maple syrup, vanilla extract, and sea salt to the chocolate mixture. Then slowly pour in the arrowroot slurry while continuously whisking. Continue to whisk until just before the mixture reaches a simmer. Immediately remove the saucepan from the heat and set it aside to cool.
- Freeze the chocolate ice cream base in cups: Fill 5 cups in a standard muffin tin to the top with the chocolate base. Place the muffin tin in the freezer, and let stand until the cups of ice cream base are frozen solid. Then pop them out of the pan and keep the cups frozen in a freezer-safe container.
- Blend the ice cream cups: When the chocolate craving strikes, break one of the ice cream cups into chunks, add to a high-power food processor or blender, and process until you achieve a creamy soft ice cream.
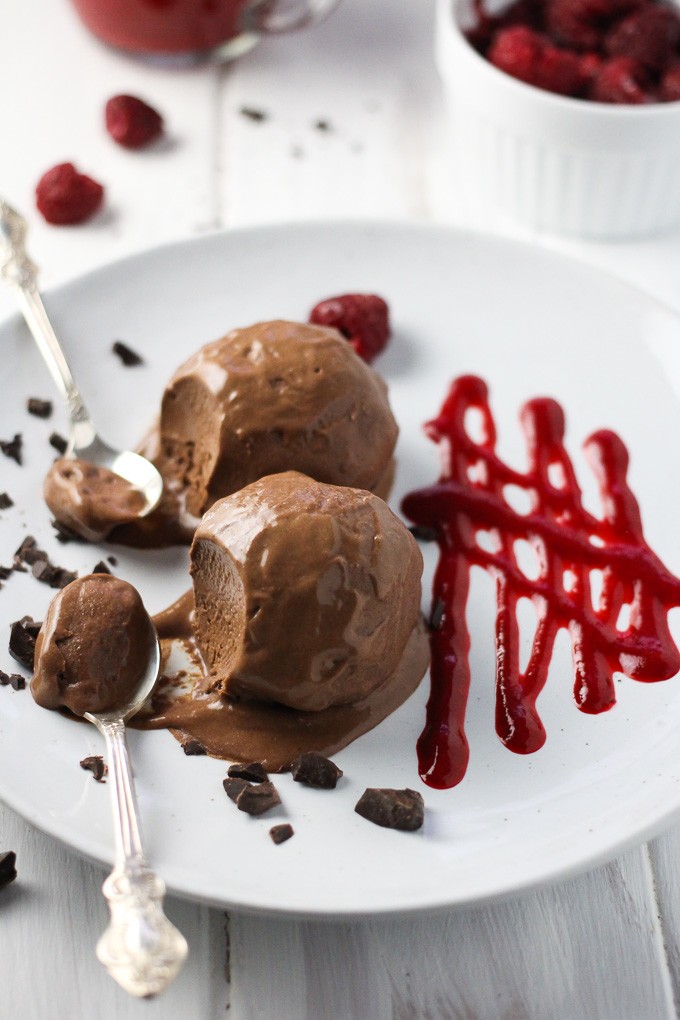
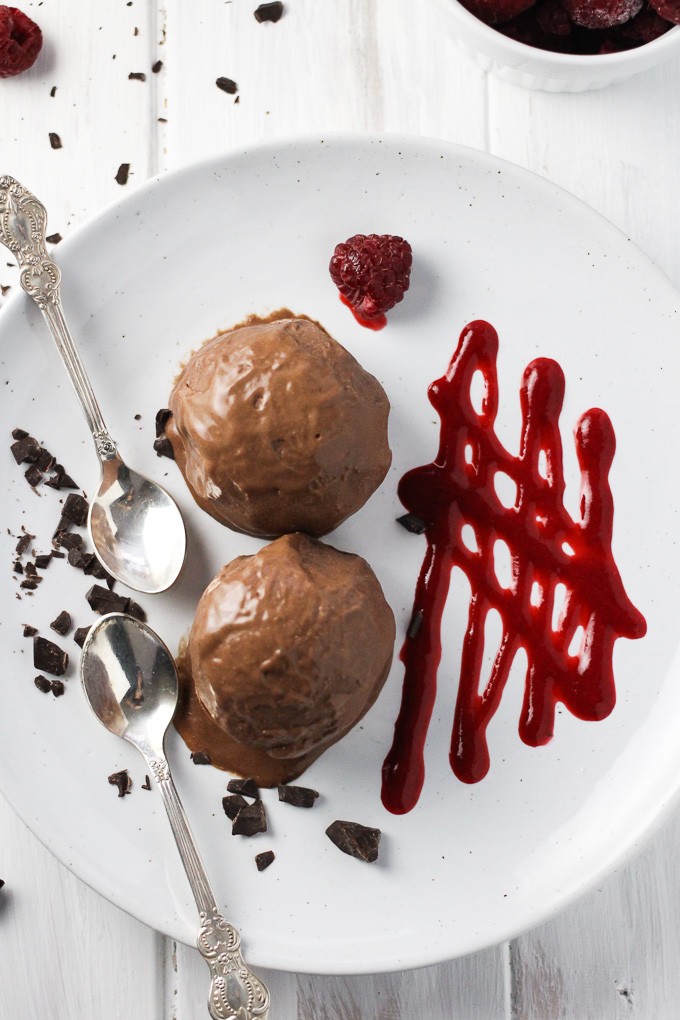
- Add toppings and serve: Scoop your ice cream into a dessert bowl and build yourself a sundae with your favorite toppings!
Recipe Tips
The ice cream base mustn’t get too hot, so remove it from the heat before it reaches a simmer. The arrowroot powder slurry loses its thickening ability if it’s overheated.
The time it takes for the ice cream base cups to freeze will depend on how cold your freezer is. It can take anywhere from 3 to 5 hours, or you can leave them to freeze overnight.
I like freezing the ice cream cups in a silicone muffin pan as they pop right out. If you’re having trouble removing the cups from a metal muffin pan, submerge the bottom of the pan in hot water to loosen them up.
If you do not have a high-power food processor or high-speed blender, let the ice cream base cup sit at room temperature to soften slightly and reduce the wear and tear on the blade.
Be patient with your food processor. It may take a few minutes to achieve the perfect texture.
Don’t crowd the food processor. Depending on its capacity, you may need to break the frozen cups into smaller chunks and blend each serving individually.
Variations
This vegan chocolate ice cream is a perfect canvas for your favorite ice cream toppings. You can sprinkle them on top for sundaes or fold the extras into the ice cream once it’s soft and blended.
Mix-ins – Toasted coconut, almonds, walnuts, hazelnuts, cacao nibs, chia seeds, mini dark chocolate chips, chocolate bark, fresh or frozen berries, etc.
Saucy Toppings – Drizzle dairy-free chocolate sauce, caramel, raspberry sauce, or blueberry sauce over the top.
Creamy Toppings – Serve with a dollop of vegan whipped cream, banana slices, almond butter, or peanut butter.
Storing
This recipe yields roughly 2 pints (5 servings) of homemade ice cream, but you do not need to blend and serve it all at once. Instead, the cups of ice cream will keep in the freezer for 2-3 months.
So you can blend as many cups as you want and keep the rest in the freezer until the next time the chocolate craving calls.
Frequently Asked Questions
Can I make this no-eggs chocolate ice cream with almond milk instead of coconut milk?
The healthy fats and layer of coconut cream you get from a can of coconut milk whip into soft ice cream like a dream. If you make it with almond milk, I can not guarantee your ice cream will be as thick and creamy.
Can I make this recipe with yogurt instead of coconut milk?
If dairy isn’t a concern, you can use full-fat plain or vanilla yogurt instead of coconut milk. However, I’ve never tested this recipe with yogurt.
More Chocolate Recipes You Will Love
- Eggless Chocolate Cupcakes
- Chocolate and Raspberry Chia Pudding
- Almond Flour Chocolate Cookies
- Chocolate Mousse Without Eggs
- Cinnamon Hot Chocolate
Chocolate Ice Cream Recipe (No Eggs)
Equipment
- Fine Mesh Strainers (for raspberry sauce)
Ingredients
- 1 can (14 oz/398 ml) full-fat coconut milk
- 2 Tbsp arrowroot powder
- 2 oz (56.7 grams) 100% pure unsweetened baker's chocolate
- 2½ Tbsp maple syrup
- 1 tsp vanilla extract
- ¼ tsp sea salt
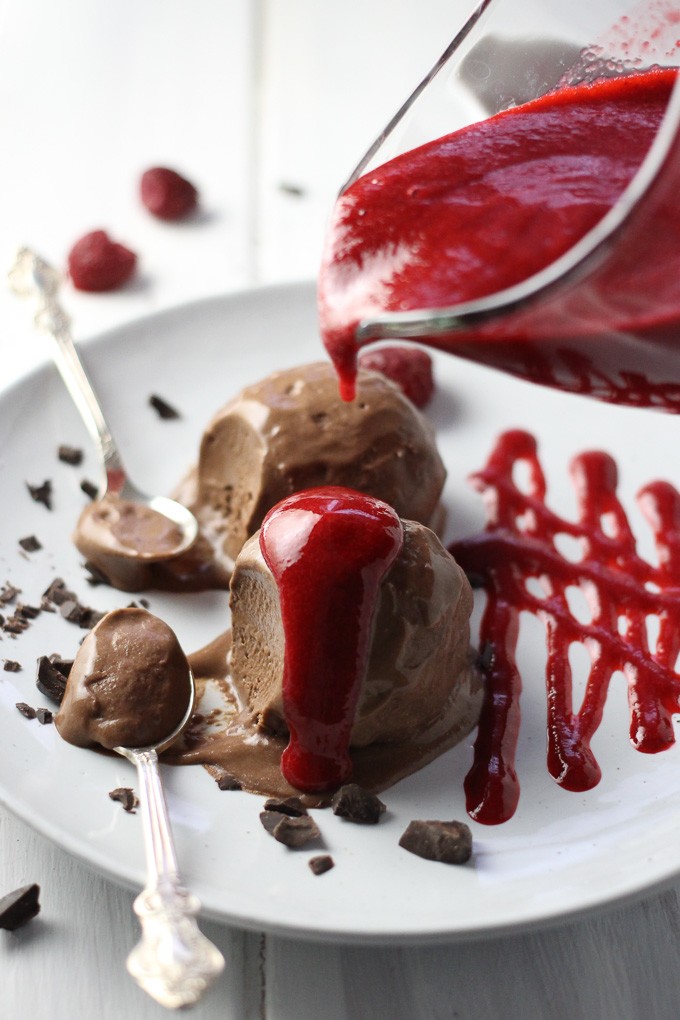
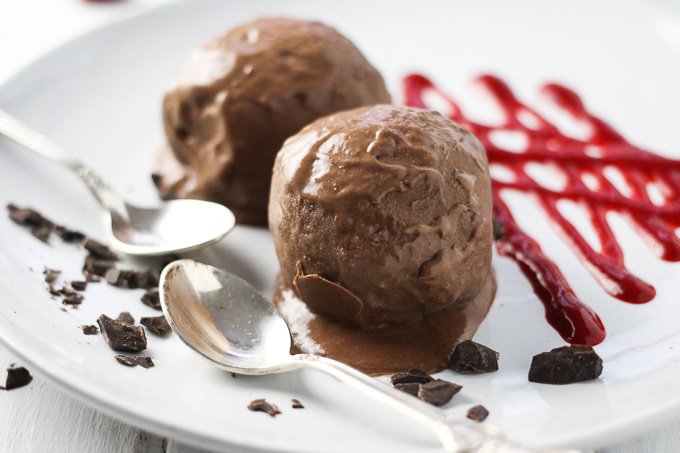
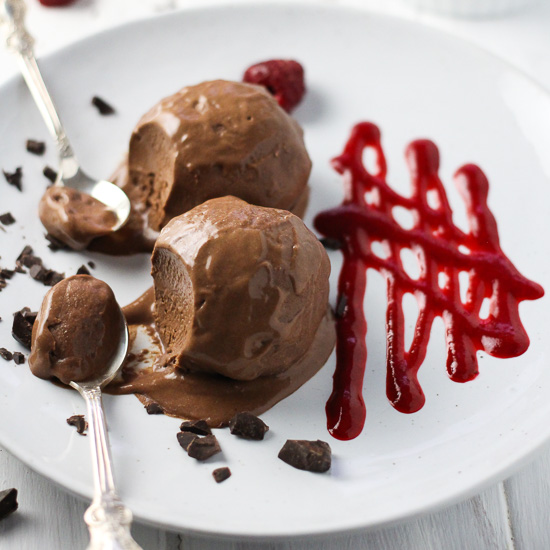
To serve the ice cream as in the photo:
- 400 gr fresh or frozen raspberries
- 1 to 2 Tbsp maple syrup
Instructions
Chocolate Ice Cream Base:
- When you open the coconut milk can, you should see the white coconut cream and coconut water. Add 2 to 3 tablespoons of the coconut water into a small bowl. Scoop the rest of the coconut milk from the can into a saucepan.
- Add the arrowroot powder to the coconut water and whisk well until dissolved. Set aside.
- Place the chocolate into the saucepan where you have the coconut cream and start warming it up over medium heat, first stirring with a spoon and then whisking with a whisk. Whisk until the chocolate and coconut milk are thoroughly combined.
- Add the maple syrup, vanilla extract, and sea salt.
- Slowly add the arrowroot powder and coconut water mixture, making sure to constantly whisk. Keep whisking and warming up the mixture until it thickens. Make sure not to boil or simmer because arrowroot powder loses its thickening ability when overheated.
- Let the ice cream base cool completely.
No Churn Method:
- Pour the ice cream base into a muffin pan. This recipe makes enough ice cream base to fill 5 muffin pan cups if using a standard 12-cup muffin pan.
- Place the muffin pan into the fridge and let the ice cream freeze. Depending on the temperature in your freezer, it might take anywhere between 3 and 5 hours. You can also leave it there overnight.
- Once the ice cream base is frozen, pop the ice cream cups out of the muffin pans. You can store them in a glass container with a tight lid or a freezer bag. I have a silicone muffin pan, so the ice cream cups easily pop out. But if you have a metal muffin pan, you can briefly place the bottom of the muffin pan into hot water to loosen them up.
- Once you are ready to serve the ice cream, break one ice cream cup into 4 pieces and then process it in a food processor until you get soft ice cream (check the instructions of your food processor first to make sure it's powerful enough to crush it).
Raspberry Sauce for Serving:
- Place the raspberries in a blender or food processor and blend until smooth. If the puree remains frozen after blending, transfer it to a saucepan and gently thaw over medium heat, stirring constantly until fully liquefied. Do not allow it to warm beyond that point.
- Set a mesh strainer over a bowl and pour in the raspberry puree. Use a rubber spatula to press the puree through the strainer, discarding the seeds.
- Stir in the maple syrup or other sweetener to taste.
- Transfer the finished puree to a glass jar with a tight-fitting lid and store in the refrigerator for up to 4 days.
Recipe Notes
The nutrition facts are an estimate. Variations in ingredient brands, portion sizes, or substitutions can affect the final nutritional values. For the most accurate information, please use a nutrition calculator or consult with a healthcare provider. Always ensure that each of the ingredients is allowed in your diet.

Meet Maria
Maria Ushakova is a holistic nutritionist and food blogger. She focuses on developing easy recipes using real food ingredients. She believes that healthy food is delicious and anyone can learn how to cook it. Maria’s work has appeared on numerous popular websites as well as in print.